Repairing sisal boards is often a simpler process than you might think. This guide will show you how to effectively repair common sisal board damage, restoring your board to its former glory. We’ll cover everything from identifying the damage to choosing the right materials and techniques for a lasting fix.
⚠️ Still Using Pen & Paper (or a Chalkboard)?! ⚠️
Step into the future! The Dart Counter App handles all the scoring, suggests checkouts, and tracks your stats automatically. It's easier than you think!
Try the Smart Dart Counter App FREE!Ready for an upgrade? Click above!
Sisal dartboards, while durable, are susceptible to wear and tear. Regular use, especially from powerful throws, can lead to damaged sisal fibers, loose wires, or even broken segments. Understanding how to address these issues is crucial to prolonging the life of your board and maintaining a consistent game.
Fortunately, repairing sisal boards is often a manageable DIY project. This guide provides a comprehensive overview of the process, equipping you with the knowledge and confidence to tackle those annoying repairs.
Repairing Sisal Boards: Addressing Common Damage
Before diving into the specifics of repairing sisal boards, let’s identify the most common types of damage you might encounter. This will help you determine the best approach for your specific repair job.
Loose Sisal Fibers
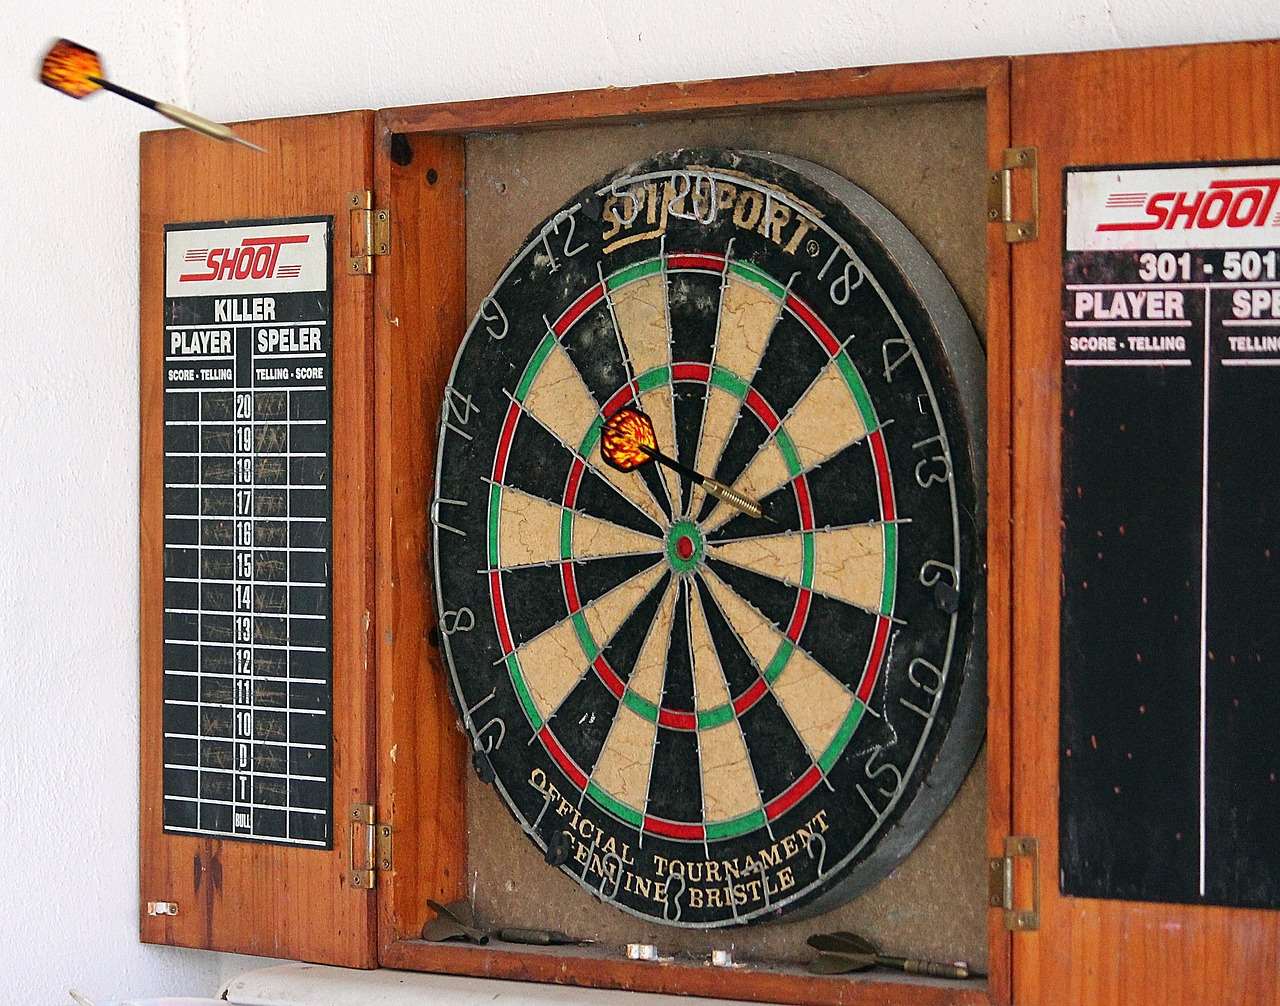
One of the most frequent issues is loose or frayed sisal fibers. These often appear as small, tufts of sisal sticking out from the surface. They can disrupt the flight of your darts and gradually worsen with continued use. Addressing these loose fibers early prevents further damage. You can simply trim these with sharp scissors, being careful to cut only the loose fibers without damaging the surrounding sisal.
Damaged or Missing Sisal Segments
More significant damage might involve larger areas of damaged or completely missing sisal. This type of damage often requires more extensive repairs. This could range from patching smaller holes to replacing an entire segment of the board – a task best tackled with dedicated sisal repair kits that often include replacement sisal patches and strong adhesive.
Worn-Down Wire Ring
The metal wire that separates the number sections can sometimes become damaged or loose. This can impact the board’s overall structural integrity. If the wire is just loose, tightening it with pliers might suffice. However, if the wire is broken or severely damaged, replacing the wire or the entire dartboard spider might be necessary. Check out our guide on dartboard spider replacement for detailed instructions.
Loose or Damaged Numbers
Over time, the numbers on your sisal board can become loose or damaged. If they are simply loose, you can carefully secure them back in place using a strong adhesive. If the numbers are damaged beyond repair, replacing them is essential, something we discuss further in our article on dartboard number replacement tools. For a premium gaming experience, check out our tips on dartboard care tips for professionals.
Choosing the Right Tools and Materials for Repairing Sisal Boards
The success of your sisal board repair hinges on using the right tools and materials. This section outlines the essentials for various repair scenarios.
- Sharp scissors: Essential for trimming loose sisal fibers.
- Sisal repair kit: Provides replacement sisal patches and adhesive specifically designed for sisal board repairs.
- Strong adhesive: For securing loose numbers or patches.
- Pliers: Useful for tightening loose wires.
- Small screwdriver (optional): May be necessary for some wire ring repairs.
- Replacement numbers (if needed): To replace damaged or missing numbers.
When choosing an adhesive, prioritize one specifically formulated for use with sisal. Regular household glues may not provide the strength and durability required for a long-lasting repair. It’s crucial to choose tools and materials which are suitable for the specific task. Improper choices can lead to ineffective repairs and potentially cause further damage.
Step-by-Step Guide to Repairing Sisal Boards
Now that you’re equipped with the right tools and materials, let’s tackle the actual repair process. Remember, patience and precision are key to achieving a professional-looking and durable repair.

Step 1: Assess the Damage
Carefully examine the damaged area to determine the extent of the problem. This assessment will guide your choice of repair techniques and materials. Knowing the type of damage—whether it’s loose fibers, a hole, or damaged wire—will help you choose the appropriate approach.
Step 2: Prepare the Area
Before applying any adhesive or patches, ensure the area around the damage is clean and free from dust or debris. A clean surface promotes better adhesion and ensures a more secure repair. Consider using a gentle brush or compressed air to remove loose particles.
Step 3: Apply Adhesive and Patches (if necessary)
Apply a thin layer of adhesive to the damaged area according to the manufacturer’s instructions. If using a sisal patch, position it carefully over the damaged area. Gently press down to ensure good contact between the patch and the board. Allow ample time for the adhesive to dry completely as per the instructions on the packaging.
Step 4: Secure Loose Wires or Numbers
If dealing with loose wires, carefully tighten them with pliers. If numbers are loose, apply a small amount of adhesive to the back of the number and press firmly into place. Allow sufficient drying time.
Step 5: Final Touches
Once the adhesive is fully dry, inspect your repair to ensure it is secure and aesthetically pleasing. Carefully trim any excess sisal fibers or adhesive that might have seeped out during the repair process.
Maintaining Your Sisal Board for Longevity
Repairing sisal boards is important, but proactive maintenance goes a long way in preventing damage in the first place. Here are some valuable maintenance tips:
- Regular cleaning: Gently wipe down your board after each use to remove dust and debris.
- Proper storage: When not in use, store your board in a dry, climate-controlled environment to prevent warping or moisture damage.
- Careful dart throws: Avoid excessively hard throws, as this can contribute to premature wear and tear.
- Consider a flight protector: Check out our guide on the benefits of flight protectors.
- Professional maintenance: For extensive damage or if you’re unsure about tackling a repair yourself, consider consulting a professional dartboard maintenance service.
By following these tips, you’ll significantly extend the lifespan of your sisal dartboard, reducing the need for frequent repairs. Regular maintenance is much easier and cost-effective than repairing extensive damage later on.
Troubleshooting Common Repairing Sisal Boards Issues
Even with careful execution, some issues might arise during repairing sisal boards. This section addresses some common challenges and provides solutions.
- Patch not adhering properly: Ensure the surface is clean and dry before applying adhesive. Use an appropriate adhesive designed for sisal.
- Sisal fibers are still loose: Try applying additional adhesive or using a smaller patch to reinforce the area.
- Wire is too difficult to tighten: Use appropriate-sized pliers for the job, or consider replacing the wire if severely damaged.
- Numbers are difficult to secure: Use a strong adhesive designed for use with wood and numbers and ensure the area is clean and dry.
If you encounter persistent problems, consider seeking advice from online communities or professionals specializing in dartboard repair. Many resources are available online to assist you. We have resources available for dart equipment troubleshooting online, dart equipment repair troubleshooting guide, and even dart equipment troubleshooting learning online.
Beyond Repairing Sisal Boards: Maintaining Your Entire Dart Setup
Proper maintenance isn’t limited to just repairing sisal boards. Your entire dart setup requires attention to ensure optimal performance and longevity. This includes your darts themselves, which can be sharpened or customized to enhance performance. Check out our guide on dart sharpening and dart value or learn how to customize dart shaft material.
Regularly inspecting and maintaining all your equipment will enhance your gaming experience and extend the lifespan of your equipment considerably. Remember, consistent care is essential for any serious player. And don’t forget to check out our comprehensive guide on Darts Equipment Maintenance Customization for more tips and tricks.
For any issues beyond simple repairs, don’t hesitate to consult our comprehensive Repairing dartboard for personal use guide.
Conclusion
Repairing sisal boards is a valuable skill for any dart enthusiast. By understanding the common types of damage, selecting the appropriate tools and materials, and following the steps outlined in this guide, you can effectively restore your board and maintain a consistent and enjoyable game. Remember that regular maintenance is key to minimizing repairs and extending the life of your dartboard. So, grab those tools, and get ready to bring your sisal board back to life!
Hi, I’m Dieter, and I created Dartcounter (Dartcounterapp.com). My motivation wasn’t being a darts expert – quite the opposite! When I first started playing, I loved the game but found keeping accurate scores and tracking stats difficult and distracting.
I figured I couldn’t be the only one struggling with this. So, I decided to build a solution: an easy-to-use application that everyone, no matter their experience level, could use to manage scoring effortlessly.
My goal for Dartcounter was simple: let the app handle the numbers – the scoring, the averages, the stats, even checkout suggestions – so players could focus purely on their throw and enjoying the game. It began as a way to solve my own beginner’s problem, and I’m thrilled it has grown into a helpful tool for the wider darts community.