Properly mounting a dartboard is crucial for fair play, accurate scoring, and protecting your walls. This article provides a comprehensive guide on how to safely and securely install your dartboard, covering everything from choosing the right location to the necessary tools and techniques, ensuring you can enjoy countless games of darts in the comfort of your own home.
⚠️ Still Using Pen & Paper (or a Chalkboard)?! ⚠️
Step into the future! The Dart Counter App handles all the scoring, suggests checkouts, and tracks your stats automatically. It's easier than you think!
Try the Smart Dart Counter App FREE!Ready for an upgrade? Click above!
Choosing the Perfect Location for Mounting a Dartboard
Before you even think about picking up a drill, carefully consider the ideal location for your new dartboard setup. This decision significantly impacts your playing experience and the safety of your surroundings. Several factors come into play:
- Space Requirements: You’ll need ample space for players to stand at the regulation throwing distance (7 feet 9 1/4 inches from the board for steel-tip darts). Also, consider adequate space behind the players for movement and comfort.
- Wall Protection: Darts can stray! Choose a wall that’s either durable enough to withstand occasional impacts or that you’re willing to protect with a backboard or surround.
- Lighting: Good lighting is essential for accurate aiming and enjoyable gameplay. Natural light is ideal, but if that’s not available, ensure you have a well-placed light source that illuminates the dartboard evenly without creating glare.
- Proximity to Others: Avoid placing the dartboard in a high-traffic area where people might accidentally walk in front of a throw.
- Floor Surface: Consider the flooring beneath the dartboard. Hard surfaces can damage darts that fall, while softer surfaces can provide some cushioning. A dart mat is a great investment.
Once you’ve considered these factors, you can start thinking about the actual mounting process. Remember, a well-chosen location contributes significantly to a safe and enjoyable darts experience.
Essential Tools and Materials for Mounting a Dartboard
Having the right tools and materials on hand before you begin mounting a dartboard will make the process much smoother and more efficient. Here’s a comprehensive list:
- Dartboard: Obviously!
- Mounting Bracket: Most dartboards come with a mounting bracket consisting of a circular metal plate and a wall bracket.
- Screws: Use appropriate screws for the wall material (drywall, wood, plaster). Drywall anchors may be necessary for added stability.
- Drill: A power drill is essential for creating pilot holes and securing the mounting bracket.
- Screwdriver: You’ll need a screwdriver to tighten the screws.
- Measuring Tape: Accurate measurements are crucial for proper dartboard height.
- Level: Ensure the dartboard is perfectly level for fair play.
- Pencil: For marking the wall.
- Stud Finder (Optional): If possible, anchoring the dartboard into a wall stud will provide the most secure mounting.
- Dartboard Surround (Optional): A dartboard surround protects the wall from stray darts and reduces bounce-outs.
- Dart Mat (Optional): A dart mat protects the floor and provides a consistent throwing distance. Consider checking out raised darts oche argos.
Having these tools and materials prepared will streamline the mounting process and help you achieve a professional-looking result. It’s also a good idea to have a friend assist you, especially when lifting and positioning the dartboard.
Step-by-Step Guide to Mounting a Dartboard
Now for the main event! Follow these step-by-step instructions for successfully mounting a dartboard:
- Measure and Mark the Height: The center of the dartboard (the bullseye) should be exactly 5 feet 8 inches (1.73 meters) from the floor. Use your measuring tape and pencil to mark this point on the wall.
- Install the Wall Bracket: Position the wall bracket at the marked height, ensuring it’s level. Use your pencil to mark the screw holes. If possible, use a stud finder to locate a wall stud for maximum support. If not, use drywall anchors. Drill pilot holes and secure the wall bracket with screws.
- Attach the Circular Metal Plate to the Dartboard: Most dartboards have pre-drilled holes on the back for attaching the circular metal plate. Screw the plate securely into the dartboard.
- Hang the Dartboard on the Wall Bracket: Carefully align the circular metal plate on the back of the dartboard with the wall bracket. The dartboard should hang securely on the bracket.
- Adjust and Level: Use a level to ensure the dartboard is perfectly vertical. Most dartboards have a rotating mechanism that allows you to make fine adjustments.
- Test the Setup: Throw a few darts to test the stability of the dartboard and the accuracy of your mounting. Make any necessary adjustments. Consider using a Best darts scoring app to track your games.
By following these steps carefully, you can ensure that your dartboard is securely mounted at the correct height and perfectly level, providing an optimal playing experience.
Ensuring Proper Dartboard Height and Throwing Distance
The official regulations for dartboard height and throwing distance are crucial for fair and consistent gameplay. As mentioned previously, the center of the bullseye should be 5 feet 8 inches (1.73 meters) from the floor. The throwing distance, measured from the face of the dartboard to the oche (throwing line), should be 7 feet 9 1/4 inches (2.37 meters) for steel-tip darts. For soft-tip darts, the distance may vary slightly depending on the specific rules being followed.
Maintaining these dimensions ensures that all players are competing on a level playing field. Using a measuring tape to verify these distances before each game is highly recommended, especially if you play with different people or in different locations. Incorrect height or distance can significantly affect your accuracy and throwing technique. Some players use a darts scorer voice to keep track of scores during a game.
Advanced Tips for Mounting a Dartboard with Stability
While the basic mounting process is straightforward, there are several advanced tips that can further enhance the stability and longevity of your dartboard setup:
- Use a Backboard: A backboard made of wood or cork provides extra protection for the wall and reduces bounce-outs. Mount the backboard to the wall first, then mount the dartboard to the backboard.
- Consider a Dartboard Surround: A dartboard surround is a padded ring that surrounds the dartboard, catching stray darts and preventing damage to the wall.
- Reinforce Drywall Anchors: If you’re using drywall anchors, consider using heavier-duty anchors that can support more weight.
- Regularly Check and Tighten Screws: Over time, screws can loosen due to vibrations from the darts hitting the board. Regularly check and tighten the screws to ensure the dartboard remains securely mounted.
- Use Anti-Vibration Pads: Placing small anti-vibration pads between the dartboard and the wall bracket can help to reduce noise and vibration.
Dealing with Different Wall Types When Mounting
Different wall types require different mounting techniques. Here’s a guide to dealing with common wall materials:
- Drywall: Drywall is a common wall material, but it’s not very strong. Use drywall anchors to provide extra support. Consider finding a stud for maximum stability.
- Wood: Wood walls are ideal for mounting a dartboard, as screws can be driven directly into the wood. Drill pilot holes to prevent splitting the wood.
- Plaster: Plaster walls can be tricky, as they can crack easily. Use special plaster anchors that are designed to grip the plaster without damaging it.
- Concrete: Concrete walls require special concrete screws and a hammer drill to create the holes.
- Brick: Similar to concrete, brick walls require special brick screws and a hammer drill.
Always use the appropriate screws and anchors for the specific wall material to ensure a secure and stable mounting.
Troubleshooting Common Mounting Problems
Even with careful planning, you might encounter some problems when mounting a dartboard. Here are some common issues and their solutions:
- Dartboard is Not Level: Use the rotating mechanism on the back of the dartboard to make fine adjustments. Double-check with a level to ensure it’s perfectly vertical.
- Dartboard is Wobbly: Tighten the screws on the mounting bracket and the circular metal plate. If the drywall anchors are loose, replace them with heavier-duty anchors.
- Darts are Bouncing Out: Make sure the dartboard is securely mounted and that the sisal fibers are not damaged. Rotate the dartboard regularly to distribute wear.
- Wall is Damaged: Use a backboard or dartboard surround to protect the wall from stray darts. Repair any existing damage with spackle or drywall compound.
Dartboard Maintenance for Longevity
Once you’ve successfully mounted your dartboard, regular maintenance is crucial to ensure its longevity and optimal performance. Here are some tips:
- Rotate the Dartboard Regularly: Rotating the dartboard distributes wear and tear, preventing certain sections from becoming overly worn.
- Moisten the Sisal Fibers: Sisal fibers can dry out over time, leading to bounce-outs. Lightly moisten the fibers with water occasionally to keep them supple. Avoid over-wetting the board.
- Remove Loose Fibers: Remove any loose fibers from the board to prevent them from interfering with the darts.
- Avoid Direct Sunlight: Direct sunlight can damage the sisal fibers and fade the colors.
- Clean the Board Regularly: Dust and debris can accumulate on the board, affecting its performance. Clean the board with a soft brush or vacuum cleaner. A darts score guy can help you keep track of everything.
Beyond Mounting: Enhancing Your Darts Experience
Mounting a dartboard is just the first step in creating the perfect darts setup. Consider these additions to enhance your overall playing experience:
- Dartboard Lighting: Invest in a dedicated dartboard lighting system to provide consistent and glare-free illumination.
- Oche (Throwing Line): Use a dedicated oche or throwing line to ensure accurate throwing distance.
- Dart Storage: Keep your darts organized and protected with a dart case or storage rack.
- Scoring System: Use a traditional chalkboard, a whiteboard, or a digital scoring app to keep track of scores. Don’t miss out on the darts scoreboard app free.
- Dartboard Cabinet: A dartboard cabinet protects the dartboard when not in use and provides a stylish addition to your game room.
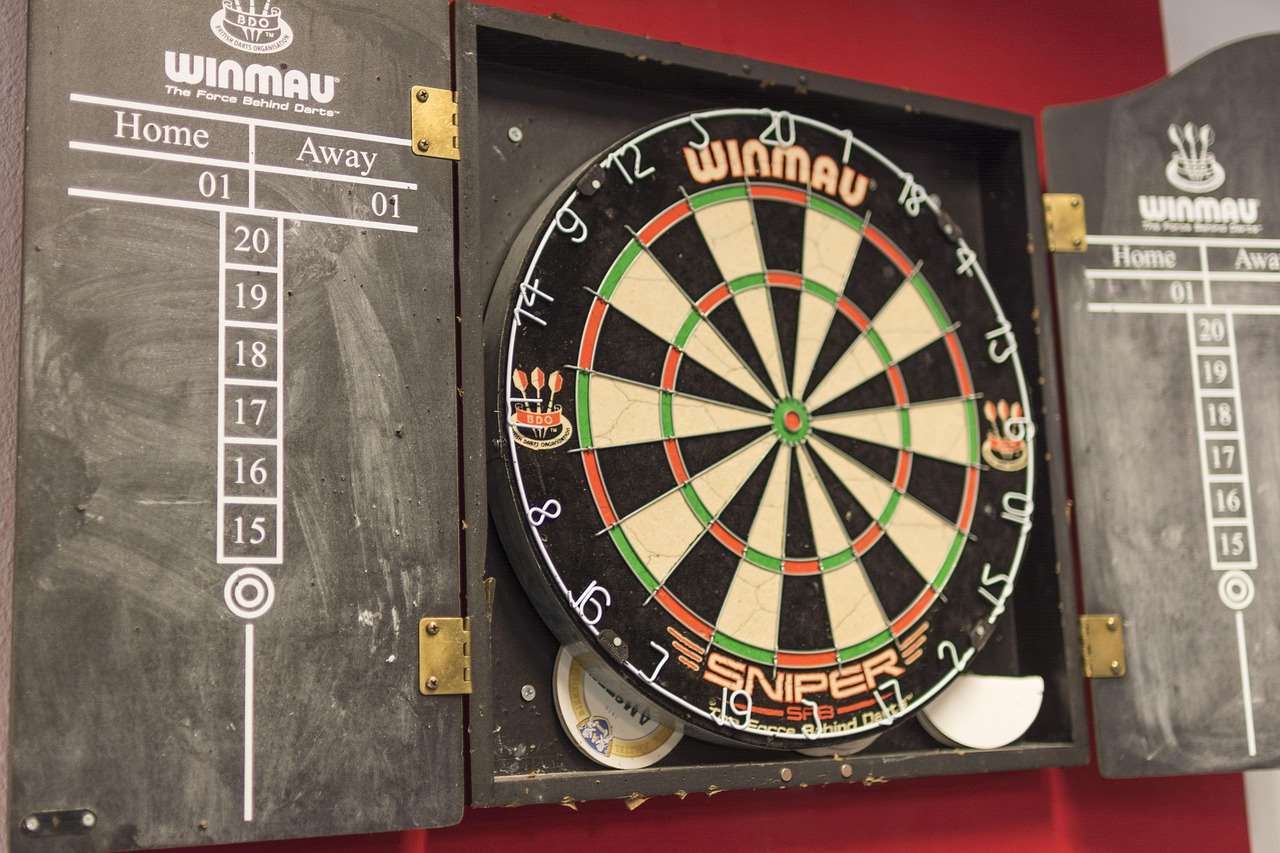
By carefully considering all these factors, you can create a darts setup that is both functional and enjoyable for years to come. Remember that darts break leg is something to avoid. A proper set up will add to the enjoyment of the game.
Conclusion
Mounting a dartboard correctly is essential for both safety and enjoyment. By following these steps, from choosing the right location to ensuring proper height and stability, you can create a professional-quality darts setup in your home. Remember to consider the wall type, use appropriate mounting hardware, and maintain your dartboard regularly. Now that you know how to safely and securely mounting a dartboard, grab your darts and start playing! Check out our other articles to learn more about darts equipment, techniques, and strategy. Happy throwing!
Hi, I’m Dieter, and I created Dartcounter (Dartcounterapp.com). My motivation wasn’t being a darts expert – quite the opposite! When I first started playing, I loved the game but found keeping accurate scores and tracking stats difficult and distracting.
I figured I couldn’t be the only one struggling with this. So, I decided to build a solution: an easy-to-use application that everyone, no matter their experience level, could use to manage scoring effortlessly.
My goal for Dartcounter was simple: let the app handle the numbers – the scoring, the averages, the stats, even checkout suggestions – so players could focus purely on their throw and enjoying the game. It began as a way to solve my own beginner’s problem, and I’m thrilled it has grown into a helpful tool for the wider darts community.