Want to enjoy a game of darts but can’t find a decent dartboard? This guide shows you **how to make dartboard** at home, saving you money and giving you a fun project! We’ll cover everything from materials and tools to step-by-step instructions, ensuring you end up with a functional and enjoyable dartboard.
⚠️ Still Using Pen & Paper (or a Chalkboard)?! ⚠️
Step into the future! The Dart Counter App handles all the scoring, suggests checkouts, and tracks your stats automatically. It's easier than you think!
Try the Smart Dart Counter App FREE!Ready for an upgrade? Click above!
Gathering Your Materials to Learn How to Make Dartboard
Before we dive into the process of **how to make dartboard**, let’s gather the necessary materials. You’ll want to source these items beforehand to ensure a smooth construction process. The materials you will need include:
- Sisal fibers: This is the traditional material for dartboards. You’ll need a large quantity, densely packed.
- Backing material: A sturdy piece of wood or plywood to support the sisal.
- Metal band: To hold the sisal fibers tightly together.
- Number ring: The numbered outer ring of a dartboard. These can often be purchased separately.
- Wire spider: The thin wires that divide the board into sections.
- Staples or strong adhesive: To secure the sisal to the backing.
- Paint: For the target segments (black, white, red, green).
Beyond these materials, you will also need specific tools to assemble your dartboard. Having the right tools is crucial for creating a high-quality, durable board that provides an enjoyable playing experience. Here are some essential tools to have on hand:
- Circular saw or jigsaw: To cut the backing material to the desired size.
- Heavy-duty stapler or nail gun: To secure the sisal tightly to the backing.
- Hammer: For any manual adjustments or securing loose parts.
- Measuring tape: To ensure accurate dimensions and alignment.
- Pencil or marker: For marking cutting lines and target segments.
- Safety glasses and gloves: To protect yourself during the construction process.
Step-by-Step Guide: Constructing Your Dartboard
Now that you have all the necessary materials and tools, let’s move on to the step-by-step guide on **how to make dartboard**. Follow these instructions carefully to ensure a properly constructed and functional dartboard.
Step 1: Preparing the Backing Board
Start by cutting your wood or plywood to the desired size. A standard dartboard is around 18 inches in diameter. Ensure the backing is perfectly round and smooth. Sand down any rough edges to prevent splinters or uneven surfaces. This is a critical foundation for your dartboard.
Step 2: Preparing and Compressing the Sisal Fibers
This is the most crucial and labour intensive step. The sisal fibers need to be tightly compressed to achieve the required density for a good dartboard. If you’re sourcing loose fibers, consider building a compression jig to help you pack them tightly into a cylindrical form. Alternatively, you can layer the sisal and use a heavy press to compress it over time.
Step 3: Attaching the Sisal to the Backing
Once the sisal is compressed and holds its shape, carefully attach it to the prepared backing board. Use a heavy-duty stapler or nail gun to secure the sisal firmly. Ensure the staples or nails are evenly spaced and penetrate deep enough to provide a strong hold. The goal is to create a solid, unified surface. Consider using a strong adhesive in addition to staples for extra durability. Using a high-quality adhesive ensures the sisal stays firmly attached to the backing, even with frequent use. Think about the pl darts fixtures you might play.
Step 4: Securing the Metal Band
The metal band is essential for holding the sisal fibers tightly together and preventing them from fraying or expanding. Carefully position the metal band around the sisal and secure it tightly. Use clamps or a similar tool to ensure the band is snug before fastening it permanently. Consider welding the band closed for a more permanent solution, or using strong metal fasteners. Having a secure metal band ensures the sisal remains compact and dense, improving the overall lifespan of your dartboard.
Adding the Finishing Touches: Numbers and Spider
With the core structure of your dartboard complete, it’s time to add the finishing touches that make it recognizable and functional. Adding the number ring and wire spider requires precision and attention to detail. These elements are vital for accurate scoring and an enjoyable playing experience. Also, finding a good darts checkout assistant can help improve your game later.
Attaching the Number Ring
The number ring is usually made of metal or plastic and is attached to the outer edge of the dartboard. The numbers must be arranged in the correct order as standard for dartboards to be playable. Use small screws or clips to attach the number ring securely. Ensure the ring is centered and flush with the surface of the dartboard. Having a properly aligned number ring ensures accurate scoring and a professional look. Incorrectly placed numbers can lead to confusion and frustration during gameplay. Consider the impact if you are darts wm 9 darter zuschauer in an audience.
Installing the Wire Spider
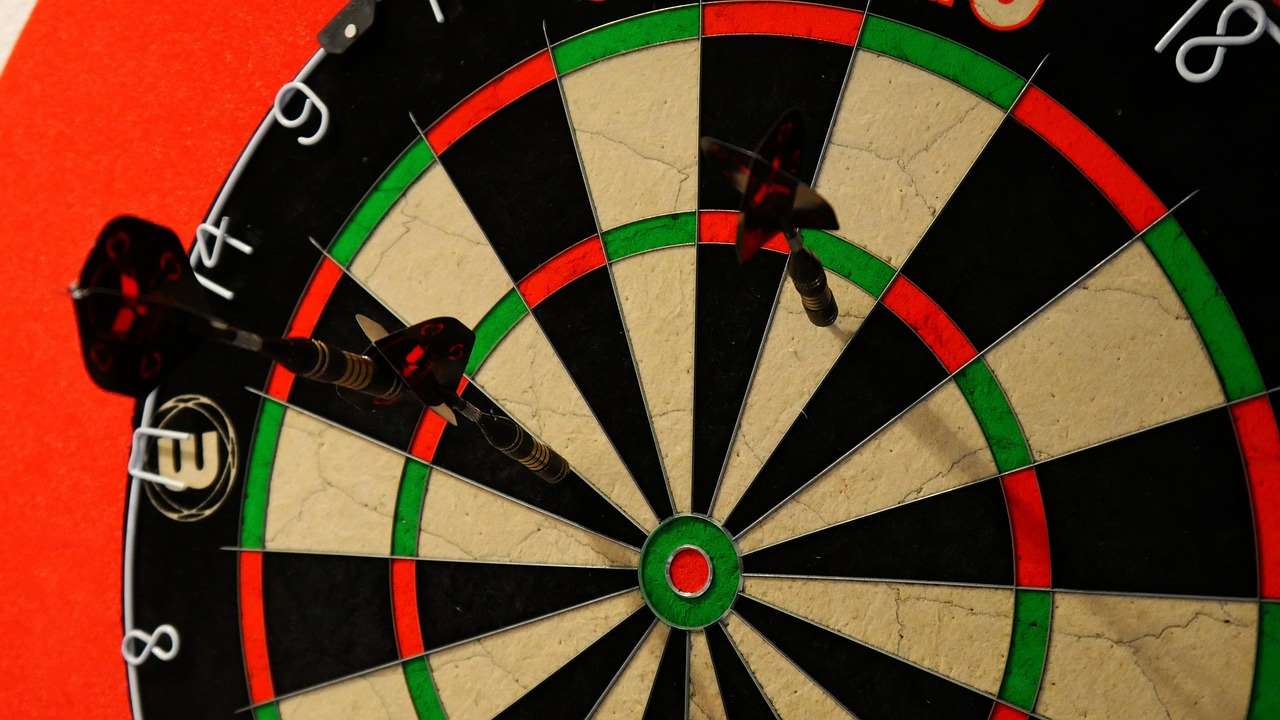
The wire spider divides the dartboard into different scoring sections and is a critical component for gameplay. The wires need to be thin enough not to cause excessive bounce-outs but strong enough to withstand repeated impacts. Use small staples or adhesive to attach the wire spider securely to the surface of the sisal. Pay close attention to alignment and spacing to ensure accurate scoring. Using thin, high-quality wires minimizes bounce-outs and improves the overall playing experience. Make sure the wires are flush with the surface of the sisal to prevent darts from hitting the wires unnecessarily.
Painting and Finishing Your Dartboard
Now for the artistic part! The final steps in **how to make dartboard** involve painting the target segments and adding any additional finishing touches. This stage allows you to customize your dartboard and make it visually appealing. Proper painting and finishing can also enhance the durability of your dartboard. Consider that dartboard gun accidents can happen!
Painting the Target Segments
Use stencils and masking tape to paint the target segments in the correct colors. The standard colors are black, white, red, and green. Apply multiple thin coats of paint for a smooth, even finish. Allow each coat to dry completely before applying the next. Using high-quality paint ensures vibrant colors and long-lasting durability. Precise painting of the target segments ensures accurate scoring and a professional look. Consider using spray paint for a smooth, even coat, but be sure to mask off the areas you don’t want to paint.
Adding Finishing Touches
Inspect your dartboard for any imperfections or areas that need additional attention. Touch up any paint flaws, tighten any loose screws or staples, and ensure all components are securely attached. You can also add a protective coating to the surface of the dartboard to enhance its durability and longevity. Having a well-finished dartboard ensures a professional look and a long lifespan. Consider adding a clear coat of varnish to protect the painted surface from wear and tear. Think about also finding a good dart points explained guide.
Alternative Materials for a DIY Dartboard
While sisal fiber is the traditional and preferred material for dartboards, it might not always be readily available or affordable. Fortunately, there are alternative materials you can use for a DIY dartboard. These alternatives may not offer the same level of durability and performance as sisal, but they can still provide a fun and functional dartboard. These options can significantly reduce costs for individuals looking to create a budget-friendly dartboard. Before we look into the construction, always check what darts questions you may have.
Cork Dartboard
Cork is a readily available and relatively inexpensive material that can be used to create a dartboard. Cork boards are easier to work with than sisal, but they are also less durable and tend to show wear and tear more quickly. To make a cork dartboard, simply glue a thick sheet of cork to a backing board and add the number ring and wire spider. Cork is a good option for casual players who don’t want to invest in a more expensive sisal dartboard. If you’re interested, there is also dart flights irish style.
Foam Dartboard
High-density foam can also be used as an alternative material for dartboards. Foam dartboards are lightweight and easy to handle, making them a good option for beginners or for use in areas where safety is a concern. However, foam dartboards are not as durable as sisal or cork and may not provide the same level of dart retention. To make a foam dartboard, cut a sheet of high-density foam to the desired size and shape, then add the number ring and wire spider. Ensure the foam is thick enough to provide adequate dart retention and prevent the darts from penetrating too deeply. This can also work with the Darts scoreboard app and have great fun.
Maintenance and Care for Your Homemade Dartboard
Once you’ve completed your DIY dartboard, it’s important to take proper care of it to ensure its longevity and optimal performance. Regular maintenance and care can significantly extend the life of your dartboard and keep it in good condition. Here are some tips for maintaining and caring for your homemade dartboard:
- Rotate the dartboard regularly: Rotating your dartboard helps to distribute wear and tear evenly across the surface, preventing specific areas from becoming overly worn.
- Remove darts carefully: Avoid twisting or pulling darts out of the dartboard, as this can damage the sisal fibers. Instead, use a dart removal tool or gently wiggle the dart until it comes loose.
- Clean the dartboard periodically: Use a soft brush or vacuum cleaner to remove dust and debris from the surface of the dartboard.
- Store the dartboard properly: When not in use, store your dartboard in a cool, dry place away from direct sunlight and extreme temperatures. This will help to prevent the sisal fibers from drying out and cracking.
Troubleshooting Common Dartboard Issues
Even with proper care and maintenance, you may encounter some common issues with your homemade dartboard. Being able to identify and troubleshoot these issues can help you keep your dartboard in good working condition. Here are some common dartboard issues and how to address them:
- Bounce-outs: If darts are frequently bouncing out of the dartboard, try sharpening your dart points or rotating the dartboard to a less worn area.
- Loose wires: If the wire spider is coming loose, use small staples or adhesive to reattach it securely to the surface of the sisal.
- Worn segments: If specific segments of the dartboard are becoming overly worn, rotate the dartboard more frequently or consider replacing the worn segments with new sisal fibers.
Beyond the Basics: Advanced Dartboard Customization
Once you’ve mastered the basics of **how to make dartboard**, you might want to explore advanced customization options to create a truly unique and personalized dartboard. These customizations can enhance the visual appeal, functionality, and overall playing experience of your dartboard. You should not use a dart wire strike kit with all boards.
Adding a Backboard or Surround
A backboard or surround can protect your walls from stray darts and provide a larger target area. You can make a backboard out of wood, cork, or foam and attach it to the wall behind your dartboard. A surround is typically made of foam or rubber and fits snugly around the dartboard to catch errant darts. Adding a backboard or surround not only protects your walls but also enhances the overall aesthetic of your dart setup. You can customize the backboard with paint, decals, or fabric to match your personal style.
Incorporating Lighting
Proper lighting is essential for a good dart setup. Insufficient lighting can make it difficult to see the target segments clearly and can lead to eye strain. You can add a dedicated dartboard lighting system to illuminate the dartboard evenly and eliminate shadows. There are various types of dartboard lighting systems available, including LED lights, halogen lights, and spotlights. Choose a lighting system that provides adequate illumination and is adjustable to suit your preferences.
Conclusion
Congratulations, you’ve learned **how to make dartboard**! From gathering materials and constructing the board to adding finishing touches and customization, you now have the knowledge to create your own dartboard. Remember to prioritize safety, take your time, and enjoy the process. A well-crafted, homemade dartboard is a source of pride and endless entertainment. So gather your tools, follow these steps, and get ready to enjoy countless games of darts on your very own creation! Now, put your skills to the test and start playing!
Hi, I’m Dieter, and I created Dartcounter (Dartcounterapp.com). My motivation wasn’t being a darts expert – quite the opposite! When I first started playing, I loved the game but found keeping accurate scores and tracking stats difficult and distracting.
I figured I couldn’t be the only one struggling with this. So, I decided to build a solution: an easy-to-use application that everyone, no matter their experience level, could use to manage scoring effortlessly.
My goal for Dartcounter was simple: let the app handle the numbers – the scoring, the averages, the stats, even checkout suggestions – so players could focus purely on their throw and enjoying the game. It began as a way to solve my own beginner’s problem, and I’m thrilled it has grown into a helpful tool for the wider darts community.