Protect your walls and enhance your dart playing experience with a simple diy dart board backing! This article provides a comprehensive guide to creating your own backboard, covering materials, construction techniques, and design ideas to ensure your walls are safe from stray darts. You’ll also learn about optimal dartboard setup and ways to personalize your game room.
⚠️ Still Using Pen & Paper (or a Chalkboard)?! ⚠️
Step into the future! The Dart Counter App handles all the scoring, suggests checkouts, and tracks your stats automatically. It's easier than you think!
Try the Smart Dart Counter App FREE!Ready for an upgrade? Click above!
Why You Need a DIY Dart Board Backing
Even the most skilled dart players occasionally miss the target. Without proper protection, those misses can lead to unsightly holes in your walls, costing you time and money for repairs. A diy dart board backing provides a large, forgiving surface that absorbs errant darts, preventing damage and preserving the integrity of your walls. Beyond protection, a well-designed backboard can significantly enhance the aesthetics of your dart playing area.
Think of your diy dart board backing as an investment in both your property and your enjoyment of the game. It’s a relatively inexpensive project that yields significant long-term benefits.
Benefits of a Backboard:
- Wall Protection: The primary purpose is to prevent damage from stray darts.
- Enhanced Aesthetics: A well-designed backboard can complement your game room décor.
- Reduced Noise: A padded backboard can help dampen the sound of darts hitting the wall.
- Improved Dartboard Stability: A solid backboard can provide a more stable mounting surface for your dartboard.
- Safety: Reduces the risk of darts ricocheting off the wall.
Choosing the Right Materials for Your DIY Dart Board Backing
The materials you choose will significantly impact the look, durability, and effectiveness of your diy dart board backing. Here’s a breakdown of some popular options:
Backing Material Options:
- Wood: Plywood, MDF (Medium-Density Fiberboard), and solid wood are all viable options. Plywood offers a good balance of strength and affordability. MDF provides a smooth, paintable surface. Solid wood can add a touch of elegance but is generally more expensive. Consider the thickness of the wood; ¾ inch is a good starting point for a sturdy backboard.
- Cork: Cork is a naturally self-healing material that’s excellent at absorbing darts. It’s relatively easy to work with and adds a unique texture to your game room. Cork sheets can be glued onto a backing of plywood or MDF for added stability.
- Foam: High-density foam boards are another option, particularly for their sound-dampening properties. However, foam may not be as durable as wood or cork and might require a fabric covering for a more finished look.
- Reclaimed Materials: Consider using reclaimed wood pallets or other salvaged materials for a rustic and eco-friendly backboard. Just be sure to properly clean and prepare the materials before use.
Covering Material Options:
- Fabric: Felt, burlap, and other fabrics can be used to cover the backing material for a more polished look. Fabric also provides an additional layer of protection and sound dampening.
- Paint: Painting your backboard is a simple and cost-effective way to customize its appearance. Choose a durable paint that can withstand repeated impact.
- Wallpaper: Wallpaper can add a decorative touch to your backboard, allowing you to match it to your existing décor.
- Cork Panels: Add a layer of cork panels, which is good for dart absorption and protecting the wall. This helps with accidental throws.
Remember to also factor in the cost of additional materials like adhesive, fasteners, and finishing products when making your decision. Choosing the right dartboard surround material impacts both budget and final visual impact. Consider what best fits the style of your game room.
Don’t forget about safety gear. When working with power tools, always wear appropriate safety glasses and hearing protection.
Building Your DIY Dart Board Backing: A Step-by-Step Guide
Now that you’ve chosen your materials, it’s time to start building your diy dart board backing. Here’s a general step-by-step guide:
- Measure and Cut: Determine the desired size of your backboard. A good starting point is a square or rectangle that’s at least 4 feet wide and 4 feet tall. Use a saw to cut your backing material to the appropriate size.
- Prepare the Surface: If using wood, sand the edges and surface to remove any splinters or rough spots. If using reclaimed materials, clean them thoroughly and remove any nails or staples.
- Add Padding (Optional): If you want to add padding for extra protection or sound dampening, glue a layer of foam or cork to the backing material.
- Apply Covering Material (Optional): If you’re using fabric, stretch it tightly over the backing material and secure it with staples or adhesive. If you’re painting, apply several coats of paint, allowing each coat to dry completely before applying the next. If wallpapering, carefully apply the wallpaper to the surface according to the manufacturer’s instructions.
- Attach Mounting Hardware: Install mounting hardware on the back of the backboard. D-rings or keyhole hangers are good options for hanging the backboard on the wall. Ensure that the hardware is securely attached and can support the weight of the backboard and dartboard.
- Mount the Dartboard: Mount your dartboard to the center of the backboard using the mounting hardware that came with the dartboard. Make sure the dartboard is securely attached and level. You might consider an entire dartboard set for sale for a complete solution.
- Test and Adjust: Throw a few darts at the dartboard to make sure everything is secure and the backboard is effectively protecting the wall. Adjust the mounting hardware as needed to ensure the dartboard is level and stable.
Pro Tip:
Use a level to ensure your backboard and dartboard are perfectly aligned. A crooked dartboard can affect your accuracy and lead to more stray darts.
Design Ideas and Customization
Your diy dart board backing is an opportunity to express your personal style and create a unique focal point for your game room. Here are a few design ideas to inspire you:
- Themed Backboards: Create a backboard that reflects your favorite sports team, hobby, or movie. Use paint, fabric, or decals to incorporate relevant imagery and colors. Think about incorporating your favorite phil taylor darts imagery.
- Chalkboard Backboards: Paint the backboard with chalkboard paint to create a surface where you can keep score, write messages, or draw.
- Framed Backboards: Add a decorative frame around the backboard for a more polished and sophisticated look.
- Lighting: Install LED strip lights around the perimeter of the backboard to create a dramatic effect and improve visibility.
- Corkboard Surround: Cover a large area with cork to maximize dart protection and also provide a place to post scores or photos.
Consider the overall aesthetic of your game room when choosing a design for your backboard. The goal is to create a cohesive and visually appealing space that enhances your enjoyment of the game.
You could even incorporate elements like darts rotating flights patterns into the design.
Dartboard Placement and Safety Considerations
Proper dartboard placement is crucial for both safety and optimal gameplay. The standard height for the center of the dartboard is 5 feet 8 inches (1.73 meters) from the floor. The throwing distance, measured from the front of the dartboard to the oche (throwing line), is 7 feet 9 1/4 inches (2.37 meters). These measurements are standard for both steel-tip and soft-tip darts.
Safety Guidelines:
- Clearance: Ensure there is ample clear space around the dartboard, free from obstacles like furniture, doorways, and other people.
- Lighting: Provide adequate lighting to illuminate the dartboard and surrounding area. This will improve visibility and reduce the risk of accidents.
- Spectator Positioning: Designate a safe viewing area for spectators, away from the throwing line.
- Dart Storage: Store darts in a safe place, out of reach of children.
- Protective Flooring: Consider using a dart mat to protect the floor from dropped darts and provide a non-slip surface for players.
By following these safety guidelines, you can create a safe and enjoyable dart playing environment for everyone.
Always check the local rules when participating in an electronic darts championship.
Maintaining Your DIY Dart Board Backing
To ensure your diy dart board backing lasts for years to come, regular maintenance is essential.
- Cleaning: Regularly clean the surface of the backboard to remove dust, dirt, and dart marks. Use a damp cloth and mild detergent.
- Repairing Damage: If the backboard sustains any damage from stray darts, repair it promptly. Fill holes with wood filler or patching compound and repaint or recover the affected area.
- Tightening Hardware: Periodically check the mounting hardware to ensure it is still secure. Tighten any loose screws or bolts.
- Replacing Covering Material: If the covering material becomes worn or damaged, replace it as needed.
With proper care and maintenance, your diy dart board backing will continue to protect your walls and enhance your dart playing experience for years to come. Consider this just like using a Cricket darts scorer app, a quality of life improvement that helps you focus on the game.
Troubleshooting Common Issues
Even with careful planning and execution, you might encounter some challenges during the construction or use of your diy dart board backing. Here are some common issues and how to address them:
- Dartboard Wobbles: If your dartboard wobbles, check the mounting hardware to make sure it’s securely attached to both the backboard and the wall. You may need to use shims to level the dartboard.
- Darts Bounce Out: If darts frequently bounce out of the dartboard, it could be due to dull dart tips or a worn-out dartboard. Sharpen your dart tips regularly and consider replacing your dartboard if it’s heavily used.
- Backboard Damage: If the backboard sustains significant damage, consider reinforcing it with additional layers of material or replacing it altogether.
- Noise Complaints: If you’re receiving noise complaints from neighbors, consider adding extra padding to the backboard or moving the dartboard to a different location.
By addressing these common issues promptly, you can keep your diy dart board backing in optimal condition and avoid any disruptions to your dart playing enjoyment.
Read more about darts scoring rules 01 to become a better player and reduce stray darts.
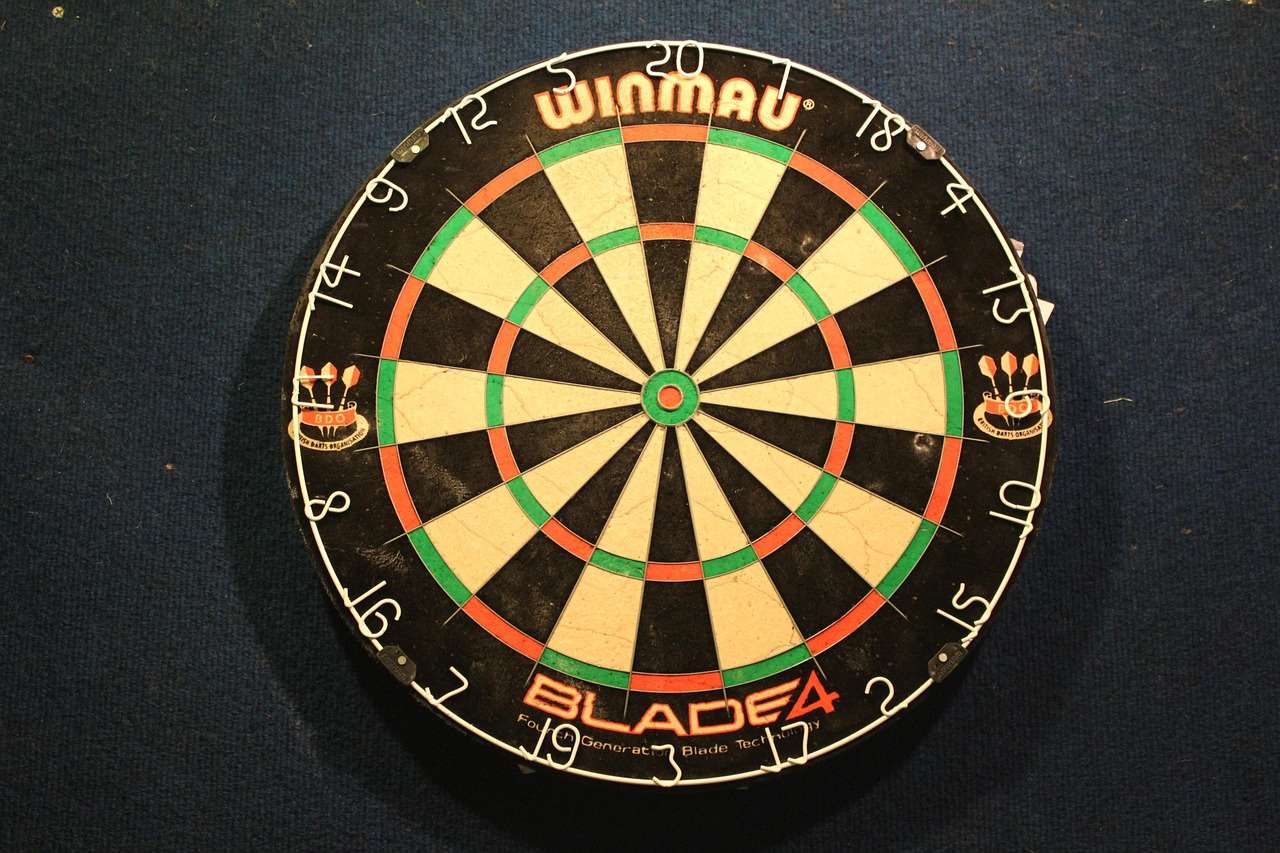
Alternatives to DIY Dart Board Backing
While a diy dart board backing is a great option for many, there are also commercially available alternatives to consider:
- Dartboard Surrounds: These are pre-made rings that fit around the dartboard and provide a protective barrier. They’re typically made of durable materials like plastic or rubber and are easy to install.
- Dartboard Cabinets: These cabinets house the dartboard and provide a built-in backboard. They often include scoring panels and dart storage.
- Freestanding Dartboard Stands: These stands allow you to set up your dartboard anywhere without having to mount it on a wall. They typically include a backboard and may also have features like scoring panels and dart storage.
Weigh the pros and cons of each option before making a decision. A diy dart board backing offers a cost-effective and customizable solution, while commercially available alternatives provide convenience and a more polished look.
Conclusion
Creating a diy dart board backing is a worthwhile project that protects your walls, enhances your game room, and adds a personal touch to your dart playing experience. By choosing the right materials, following the step-by-step instructions, and incorporating your own design ideas, you can create a backboard that meets your specific needs and preferences.
Remember to prioritize safety by following the recommended guidelines for dartboard placement and clear space. Regularly maintain your backboard to ensure it lasts for years to come.
So, gather your materials, grab your tools, and get ready to build your own diy dart board backing! Protect your walls and have fun playing darts! Visit your local home improvement store or online retailer to get started today! Don’t forget to check out dartshop madhouse for accessories!
Hi, I’m Dieter, and I created Dartcounter (Dartcounterapp.com). My motivation wasn’t being a darts expert – quite the opposite! When I first started playing, I loved the game but found keeping accurate scores and tracking stats difficult and distracting.
I figured I couldn’t be the only one struggling with this. So, I decided to build a solution: an easy-to-use application that everyone, no matter their experience level, could use to manage scoring effortlessly.
My goal for Dartcounter was simple: let the app handle the numbers – the scoring, the averages, the stats, even checkout suggestions – so players could focus purely on their throw and enjoying the game. It began as a way to solve my own beginner’s problem, and I’m thrilled it has grown into a helpful tool for the wider darts community.