Want to save money and personalize your game? Learning about dart flights diy methods unlocks a world of customization and cost-effectiveness. This article explores various ways to make your own dart flights, from simple paper crafts to more durable options, ensuring you find the perfect fit for your throwing style and budget.
⚠️ Still Using Pen & Paper (or a Chalkboard)?! ⚠️
Step into the future! The Dart Counter App handles all the scoring, suggests checkouts, and tracks your stats automatically. It's easier than you think!
Try the Smart Dart Counter App FREE!Ready for an upgrade? Click above!
Why Bother with Dart Flights DIY?
There are several compelling reasons to explore dart flights diy projects. The most obvious is cost savings. Store-bought flights can add up, especially if you’re playing regularly and experiencing frequent wear and tear. Creating your own can significantly reduce your expenses.
Beyond the financial aspect, making your own dart flights offers unparalleled customization. You can experiment with different shapes, sizes, and materials to fine-tune your darts’ trajectory and stability. This level of control is invaluable for serious players looking to optimize their performance.
Finally, dart flights diy is a fun and rewarding hobby. It allows you to express your creativity and personalize your darts with unique designs and materials. Imagine stepping up to the oche with flights that you designed and crafted yourself! It’s a great conversation starter and a point of pride.
Simple Paper Dart Flights DIY: Getting Started
For beginners, crafting dart flights diy using paper is an excellent starting point. It’s inexpensive, readily accessible, and provides a hands-on introduction to flight design. Here’s what you’ll need:
- Cardstock or heavy paper (various colors for customization)
- Scissors or a craft knife
- A ruler or straight edge
- A template (easily found online or create your own)
- Glue or strong tape
Instructions:
- Download or create a template: Many free templates are available online for standard flight shapes like standard, kite, slim, and pear. Alternatively, you can design your own custom shape.
- Print and cut: Print the template onto your chosen cardstock. Carefully cut out the flight shape using scissors or a craft knife.
- Fold (if necessary): Some templates require folding to create a more aerodynamic shape. Follow the instructions that come with your chosen template.
- Attach to the dart shaft: Insert the flight into the slots on the dart shaft. Secure with glue or a small piece of strong tape if needed. Consider using flight protectors for increased durability, especially with paper flights.
Tips for Paper Flights:
- Use heavier cardstock for increased durability.
- Experiment with different shapes to see how they affect your dart’s flight path.
- Seal the paper with a thin layer of clear acrylic spray for added water resistance.
- Reinforce the leading edges with tape to prevent tearing.
Understanding Dart Flight Shapes and Their Impact
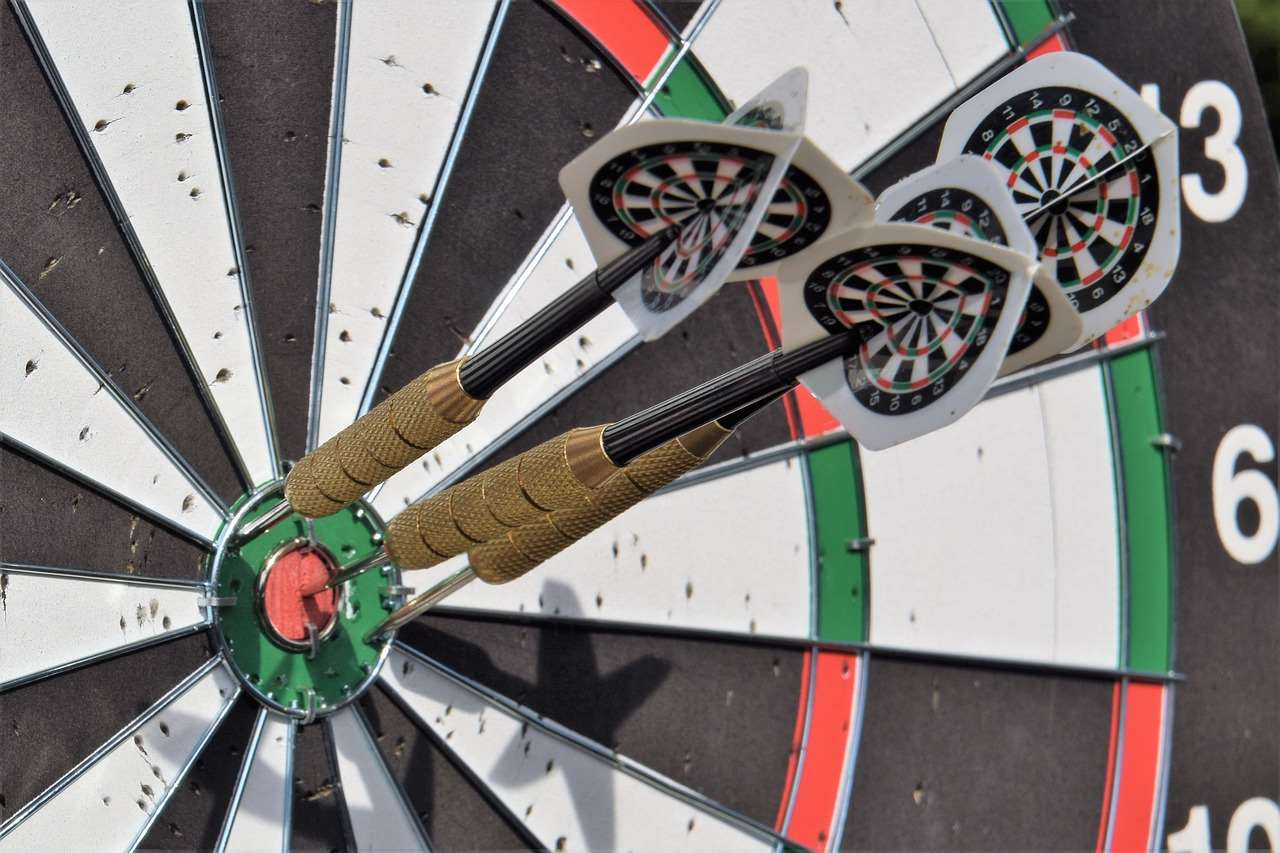
The shape of your dart flight significantly affects its aerodynamic properties and, consequently, your dart’s flight path. Here’s a breakdown of common shapes:
- Standard: The most common shape, providing a stable and predictable flight. Good for beginners.
- Kite: Similar to standard but slightly smaller, offering a balance of stability and speed.
- Slim: Reduces drag, resulting in a faster and flatter trajectory. Suitable for players with a consistent, powerful throw.
- Pear: Offers increased lift and stability, ideal for players with a slower throw or those who prefer a more arcing flight path.
Experimenting with different shapes is crucial to finding the perfect fit for your throwing style. Consider factors like your grip, throwing power, and preferred trajectory when making your decision. Be sure to track your scores using Cricket darts scorer app.
Beyond Paper: Exploring Alternative Materials for Dart Flights DIY
While paper is a great starting point, it’s not the most durable option. For more long-lasting dart flights diy, consider these alternative materials:
- Plastic Sheets: Thin sheets of polypropylene or other flexible plastics can be cut into flight shapes. They offer better durability than paper and are relatively easy to work with.
- Mylar: Mylar is a polyester film known for its strength and resistance to tearing. It’s an excellent choice for durable and long-lasting flights.
- Aluminum: Although less common for DIY flights, thin aluminum sheets can be used to create very durable flights. However, working with aluminum requires specialized tools and skills.
- Old Credit Cards or Gift Cards: Give those expired cards a new life! They’re the perfect thickness and durability for DIY flights.
Working with Plastic and Mylar
When using plastic or Mylar for dart flights diy, you’ll need a few specialized tools:
- Craft Knife: A sharp craft knife is essential for precise cutting.
- Cutting Mat: Protect your work surface with a self-healing cutting mat.
- Metal Ruler: A metal ruler provides a stable and accurate guide for cutting straight lines.
- Hole Punch: A small hole punch can be used to create holes for flight protectors or reinforced edges.
Instructions:
- Trace or adhere the template: Trace your chosen template onto the plastic or Mylar sheet. Alternatively, you can adhere the paper template directly to the material using spray adhesive.
- Carefully cut out the shape: Use a sharp craft knife and a metal ruler to carefully cut out the flight shape. Make multiple passes with light pressure rather than trying to cut through the material in one go.
- Smooth the edges: Use fine-grit sandpaper or a deburring tool to smooth any rough edges.
- Attach to the dart shaft: Insert the flight into the slots on the dart shaft. Secure with glue or tape if needed.
Adding Style and Personalization to Your Dart Flights DIY
One of the biggest advantages of dart flights diy is the ability to personalize your flights with unique designs and colors. Here are some ideas to get you started:
- Custom Colors and Patterns: Use different colored cardstock, plastic sheets, or paint to create eye-catching designs.
- Logos and Images: Print logos, images, or text onto your flights using a laser printer or inkjet printer with printable vinyl. Be careful to choose a light enough design so it doesn’t overly affect the dart’s aerodynamics.
- Airbrushing: Airbrushing allows you to create intricate designs and gradients on your flights.
- Stickers and Decals: Add stickers or decals to personalize your flights with your favorite characters, symbols, or team logos.
Protecting Your Designs
To protect your designs and prevent them from fading or scratching, consider applying a clear coat of sealant or lacquer. This will also add a layer of protection to the flight itself, extending its lifespan. You can also look at the world darts nine darter.
Troubleshooting Common Dart Flight Issues
Even with the best dart flights diy techniques, you may encounter some common issues. Here’s how to troubleshoot them:
- Flights Tearing: Use stronger materials, reinforce the edges with tape, or use flight protectors.
- Flights Falling Out: Ensure the flights are properly inserted into the dart shaft. Use glue or tape to secure them if necessary. Consider using spring rings to hold the flights securely.
- Inconsistent Flight Path: This could be due to unevenly cut flights or inconsistent throwing technique. Practice your throwing technique and ensure your flights are symmetrical.
Remember, practice makes perfect. The more you experiment with dart flights diy, the better you’ll become at crafting flights that perfectly suit your game.
Advanced Dart Flights DIY: Molded Flights
For the truly ambitious, creating dart flights diy using molding techniques is possible. This involves creating a mold of your desired flight shape and then using materials like resin or silicone to cast the flights. This method allows for highly customizable and durable flights, but it requires specialized equipment and skills.
Materials and Equipment:
- Mold Making Material: Silicone rubber is a popular choice for creating molds.
- Casting Resin or Silicone: Choose a resin or silicone that is suitable for dart flights.
- Mixing Cups and Stir Sticks: For mixing the resin or silicone.
- Vacuum Chamber (Optional): To remove air bubbles from the resin or silicone.
- Safety Gear: Gloves, eye protection, and a respirator are essential when working with resins and silicones.
Process:
- Create a Master Flight: Design and create a master flight out of clay, wood, or plastic. This will be used to create the mold.
- Create the Mold: Embed the master flight in silicone rubber to create a mold. Follow the manufacturer’s instructions for mixing and curing the silicone.
- Cast the Flights: Pour the resin or silicone into the mold. Use a vacuum chamber to remove air bubbles if necessary.
- Cure the Flights: Allow the resin or silicone to cure completely according to the manufacturer’s instructions.
- Remove and Finish: Remove the flights from the mold and trim any excess material.
Molded flights offer unparalleled customization and durability but are a more advanced dart flights diy project.
The Importance of Dart Flight Maintenance
Regardless of whether you buy your flights or create them through dart flights diy, proper maintenance is crucial for maximizing their lifespan and performance. Regularly inspect your flights for tears, bends, or other damage. Replace damaged flights immediately, as they can significantly affect your dart’s flight path.
Tips for Dart Flight Maintenance:
- Use flight protectors to prevent tearing and bending.
- Store your darts in a case to protect the flights from damage.
- Clean your flights regularly with a damp cloth to remove dust and dirt.
- Replace your flights every few weeks, even if they don’t appear to be damaged, as they can lose their shape and stiffness over time.
Finding Inspiration and Sharing Your Dart Flights DIY Creations
The internet is a treasure trove of inspiration for dart flights diy projects. Explore online forums, social media groups, and video tutorials to discover new techniques, designs, and materials. Don’t be afraid to experiment and try new things!
Sharing your creations with the online community is a great way to get feedback, exchange ideas, and inspire others. Consider posting photos of your dart flights diy projects on social media or participating in online dart forums. You might even discover a hidden talent for flight design!
Matching Dart Flights to Dart Shafts
When engaging in dart flights diy, it’s essential to consider the compatibility of your homemade flights with your dart shafts. Different shafts are designed for different flight types. Ensuring a proper fit is critical for optimal dart performance. Most shafts will accept standard flights, but specialty flights might require specific shaft types.
Common Shaft Materials:
- Aluminum: Durable and long-lasting, but can bend or break under pressure.
- Nylon/Plastic: Lightweight and flexible, but less durable than aluminum.
- Carbon Fiber: Strong and lightweight, but more expensive.
The Future of Dart Flights DIY
As 3D printing technology becomes more accessible, the possibilities for dart flights diy are expanding rapidly. 3D printers allow you to create complex and customized flight designs with unparalleled precision. While 3D printing requires an initial investment in equipment and software, it offers the potential to create truly unique and high-performance flights. Imagine printing flights with integrated textures or aerodynamic features impossible to achieve with traditional methods. The fart missile is not something that you would want to associate with your 3D printed darts.
Conclusion: Elevate Your Game with Dart Flights DIY
Exploring dart flights diy unlocks a world of customization, cost savings, and creative expression. Whether you start with simple paper flights or venture into more advanced techniques like molding or 3D printing, crafting your own flights allows you to fine-tune your darts’ performance and personalize your game like never before. So, grab your materials, unleash your creativity, and start experimenting with dart flights diy today! Remember to practice regularly and track your progress to see how different flight designs affect your scores. Who knows, you might just discover the perfect flight that takes your game to the next level!
Ready to enhance your game? Why not start by looking at our comprehensive guide to darts finish list?
Hi, I’m Dieter, and I created Dartcounter (Dartcounterapp.com). My motivation wasn’t being a darts expert – quite the opposite! When I first started playing, I loved the game but found keeping accurate scores and tracking stats difficult and distracting.
I figured I couldn’t be the only one struggling with this. So, I decided to build a solution: an easy-to-use application that everyone, no matter their experience level, could use to manage scoring effortlessly.
My goal for Dartcounter was simple: let the app handle the numbers – the scoring, the averages, the stats, even checkout suggestions – so players could focus purely on their throw and enjoying the game. It began as a way to solve my own beginner’s problem, and I’m thrilled it has grown into a helpful tool for the wider darts community.