Learning how to **dart board build** properly ensures years of enjoyment and accurate gameplay; knowing the key steps and considerations will prevent frustration and wasted effort. This article provides a comprehensive guide to selecting the right materials, assembling a sturdy backboard, and correctly mounting your dartboard for optimal performance.
⚠️ Still Using Pen & Paper (or a Chalkboard)?! ⚠️
Step into the future! The Dart Counter App handles all the scoring, suggests checkouts, and tracks your stats automatically. It's easier than you think!
Try the Smart Dart Counter App FREE!Ready for an upgrade? Click above!
Why a Solid Dart Board Build Matters
A well-executed **dart board build** goes beyond simply hanging a dartboard on a wall. It’s about creating a stable and safe playing environment. A wobbly or poorly mounted dartboard can lead to inaccurate throws, damage to your walls, and even injuries. Investing time and effort into a proper build ensures a professional-quality setup and protects your investment in your darts equipment.
Consider the long-term benefits. A sturdy **backboard** protects your wall from stray darts and significantly reduces noise. A correctly positioned board ensures fair play according to the official rules. Furthermore, a visually appealing setup enhances the overall aesthetics of your game room or entertainment area. Let’s dive into the essentials of a quality **dart board build**.
Choosing the Right Materials for Your Dart Board Build
The foundation of any successful **dart board build** lies in selecting the appropriate materials. This includes choosing the right dartboard, backboard, and mounting hardware. Each component plays a crucial role in the overall stability and longevity of your setup.
Dartboard Selection
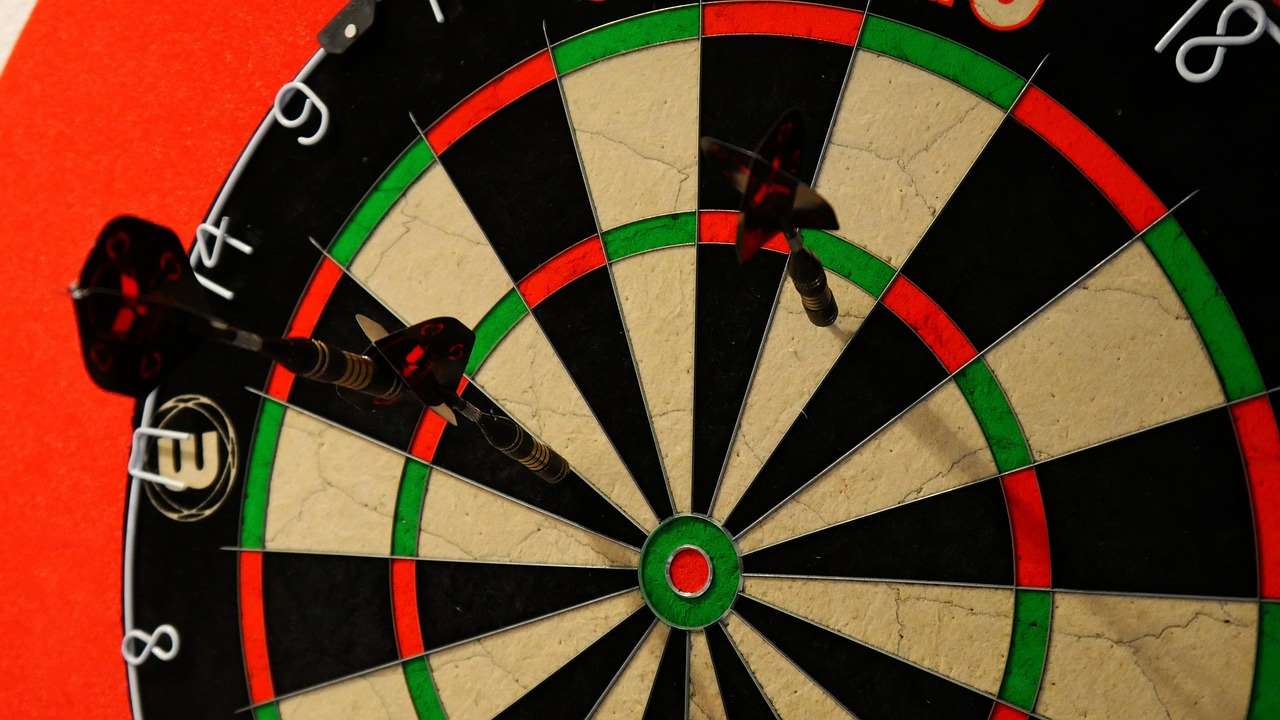
Bristle dartboards are the industry standard for steel-tip darts. Look for a high-quality sisal board with tightly packed fibers. The thinner the wire spider (the metal grid dividing the scoring sections), the fewer bounce-outs you’ll experience. Popular brands include Winmau, Unicorn, and Nodor. For electronic dartboards, consider the durability of the target segments and the responsiveness of the scoring system.
Backboard Options
The backboard serves as a protective barrier for your wall and provides a visually appealing backdrop for your dartboard. Common materials include:
- Wood: Plywood, MDF (Medium-Density Fiberboard), and solid wood are popular choices. Plywood offers a good balance of strength and affordability. MDF is smooth and easy to paint. Solid wood provides a premium look and feel.
- Foam: Foam backboards are lightweight and offer excellent protection against dart impacts. They are easy to install and available in various shapes and sizes.
- Cork: Cork is a natural and sustainable option that is self-healing, meaning the dart holes will close over time.
Consider the size of your backboard based on the surrounding space and the level of protection you desire. A larger backboard offers more coverage and reduces the risk of wall damage.
Mounting Hardware
Selecting the right mounting hardware is essential for a secure and stable installation. The hardware should be compatible with the type of wall you are mounting to (e.g., drywall, concrete, wood studs). Options include:
- Dartboard Mounting Brackets: These brackets are designed specifically for dartboards and provide a secure and adjustable mounting system.
- Screws and Anchors: Use heavy-duty screws and anchors that are appropriate for the weight of the dartboard and backboard.
- Level: A level is crucial for ensuring that the dartboard is perfectly vertical.
Ensure you have all the necessary tools, such as a drill, screwdriver, measuring tape, and pencil, before beginning the **dart board build**.
Step-by-Step Guide to Your Dart Board Build
Now that you have gathered your materials, let’s proceed with the step-by-step process of building your dartboard setup. This guide covers everything from preparing the backboard to mounting the dartboard to the wall. Proper preparation and execution are crucial for achieving a professional and durable result.
Preparing the Backboard
- Cutting the Backboard: If you are using a raw piece of wood, cut it to the desired size and shape. A common size is 3-4 feet square, but you can customize it to your preference.
- Sanding: Smooth the edges and surface of the backboard using sandpaper to prevent splinters and create a smooth finish.
- Painting or Staining: Apply a coat of paint or stain to the backboard to enhance its appearance and protect it from moisture. Choose a color that complements your game room decor. Let it dry completely.
- Adding a Design (Optional): Consider adding a design or logo to the backboard to personalize your setup. You can use stencils, paint, or decals to create a unique look.
Assembling the Mounting System
- Attaching the Mounting Bracket: If you are using a dartboard mounting bracket, attach it to the back of the backboard according to the manufacturer’s instructions.
- Marking the Wall: Use a measuring tape and pencil to mark the location of the dartboard on the wall. The center of the bullseye should be 5 feet 8 inches (1.73 meters) from the floor, conforming to the darts oche uk standard.
- Locating Wall Studs: Use a stud finder to locate the wall studs behind the drywall. Mounting the backboard to the studs provides the most secure and stable installation.
- Drilling Pilot Holes: Drill pilot holes through the backboard and into the wall studs. This will make it easier to insert the screws and prevent the wood from splitting.
Mounting the Dartboard and Backboard
- Attaching the Backboard to the Wall: Align the backboard with the pilot holes on the wall and use heavy-duty screws to attach it securely to the studs. Ensure the backboard is level before tightening the screws completely.
- Hanging the Dartboard: Hang the dartboard onto the mounting bracket on the backboard. Ensure it is securely attached and does not wobble.
- Checking the Level: Use a level to verify that the dartboard is perfectly vertical. Adjust the mounting bracket if necessary to achieve a level position.
Essential Considerations for Placement and Safety
The placement of your dartboard is crucial for both gameplay and safety. Ensure that the surrounding area is free from obstacles and that there is adequate space for players to stand and throw. Consider the following factors:
Clearance and Throw Line
The dartboard throw line, also known as the oche, should be 7 feet 9 1/4 inches (2.37 meters) from the face of the dartboard. Ensure that there is ample space behind the throw line for players to step back and throw comfortably. Avoid placing the dartboard in a high-traffic area or near furniture that could be damaged by stray darts. You can find a detailed discussion on calculating the right distance at dartboard throw line
Lighting
Proper lighting is essential for accurate gameplay. Install a dartboard lighting system that provides even illumination across the entire board. Avoid placing the dartboard in a location where it will be affected by glare or shadows. Options include circular lights that mount around the board or spotlights that shine from above.
Safety Measures
Implement safety measures to protect players and prevent accidents. Consider using a surround to catch stray darts and prevent them from hitting the wall. Instruct players to stand behind the throw line while others are throwing. Keep children and pets away from the playing area. Regularly inspect your darts for damage and replace them if necessary.
Following these guidelines will help you create a safe and enjoyable playing environment for everyone.
Maintaining Your Dart Board Build for Longevity
Proper maintenance is essential for extending the lifespan of your **dart board build** and ensuring optimal performance. Regular cleaning, rotation, and inspection will help keep your setup in top condition for years to come.
Dartboard Maintenance
- Rotating the Dartboard: Rotate the dartboard regularly to distribute wear evenly across the sisal fibers. This will prevent certain sections from becoming overly worn and extend the life of the board.
- Cleaning the Dartboard: Use a soft brush or cloth to remove dust and debris from the dartboard. Avoid using water or cleaning solutions, as they can damage the sisal fibers.
- Removing Darts: Remove darts from the board with a twisting motion to prevent damaging the fibers.
Backboard Maintenance
- Cleaning the Backboard: Wipe down the backboard regularly with a damp cloth to remove dust and dirt. Use a mild cleaner if necessary.
- Repairing Damage: Repair any holes or damage to the backboard promptly to prevent further deterioration. Use wood filler or patching compound to fill in the holes and then sand and paint the repaired area.
Hardware Maintenance
- Tightening Screws: Periodically check the mounting screws and tighten them as needed to ensure the dartboard and backboard remain securely attached to the wall.
- Replacing Hardware: Replace any damaged or worn-out hardware to maintain the stability and safety of your setup.
Troubleshooting Common Dart Board Build Issues
Even with careful planning and execution, you may encounter some common issues during your **dart board build**. Here are some tips for troubleshooting and resolving these problems:
Wobbly Dartboard
If your dartboard wobbles or feels unstable, check the mounting screws and ensure they are securely tightened. Verify that the mounting bracket is properly attached to both the backboard and the dartboard. If the problem persists, consider using shims to level the dartboard.
Wall Damage
If you are experiencing wall damage from stray darts, consider increasing the size of your backboard or adding a surround to catch the darts. Ensure that players are using darts with properly sharpened points to reduce bounce-outs. You can also use a dart flight punch tool to improve dart stability and reduce deflections.
Poor Lighting
If your dartboard is not adequately illuminated, adjust the positioning of your lighting system or consider upgrading to a brighter light source. Ensure that the light is directed evenly across the entire board and that there are no shadows or glare.
Noise Reduction
If you are concerned about noise levels, consider using a foam or cork backboard, which can help dampen the sound of the darts hitting the board. You can also add soundproofing materials to the surrounding walls to further reduce noise transmission. If you need to track your game, maybe a Dart Counter App will help?
Advanced Techniques and Customization Options
Once you have mastered the basics of a **dart board build**, you can explore advanced techniques and customization options to further enhance your setup. This includes adding custom lighting, creating a themed game room, and incorporating electronic scoring systems.
Custom Lighting
Create a unique and visually appealing lighting system using LED strips, spotlights, or custom-designed fixtures. Experiment with different colors and intensities to create the perfect ambiance for your game room. Consider using a dimmer switch to adjust the lighting based on your preference.
Themed Game Room
Transform your game room into a themed entertainment area by incorporating decorations, furniture, and accessories that complement your **dart board build**. Choose a theme that reflects your personal style and interests, such as a sports theme, a pub theme, or a modern theme. Add personal touches, such as framed photos, memorabilia, and artwork, to create a unique and inviting space.
Electronic Scoring Systems
Upgrade your gameplay experience with an electronic scoring system that automatically tracks scores and provides real-time feedback. Electronic dartboards often include built-in scoring systems, or you can use a separate scoring app or device. This can help eliminate scoring errors and make the game more enjoyable for all players.
Conclusion
A successful **dart board build** requires careful planning, attention to detail, and a commitment to quality. By following the steps outlined in this guide, you can create a stable, safe, and visually appealing dartboard setup that will provide years of enjoyment. Remember to choose the right materials, assemble the mounting system correctly, and maintain your setup regularly. With a little effort, you can transform your game room into a professional-quality darts arena. Now that you are armed with this knowledge, take the plunge and start your very own **dart board build**! Good luck, and may your darts always find their mark!
Hi, I’m Dieter, and I created Dartcounter (Dartcounterapp.com). My motivation wasn’t being a darts expert – quite the opposite! When I first started playing, I loved the game but found keeping accurate scores and tracking stats difficult and distracting.
I figured I couldn’t be the only one struggling with this. So, I decided to build a solution: an easy-to-use application that everyone, no matter their experience level, could use to manage scoring effortlessly.
My goal for Dartcounter was simple: let the app handle the numbers – the scoring, the averages, the stats, even checkout suggestions – so players could focus purely on their throw and enjoying the game. It began as a way to solve my own beginner’s problem, and I’m thrilled it has grown into a helpful tool for the wider darts community.