Want to set up your own **darts oche diy** style? It’s easier than you think! This guide will walk you through creating your own regulation-compliant oche, transforming any space into your personal darts haven. We’ll cover everything from measurements and materials to construction tips and finishing touches.
⚠️ Still Using Pen & Paper (or a Chalkboard)?! ⚠️
Step into the future! The Dart Counter App handles all the scoring, suggests checkouts, and tracks your stats automatically. It's easier than you think!
Try the Smart Dart Counter App FREE!Ready for an upgrade? Click above!
Understanding the Darts Oche: Your DIY Foundation
The **oche**, often called the throwing line or toe line, is the crucial foundation for any serious darts setup. It dictates the regulation distance between the player and the dartboard. Getting this right is essential for fair play and accurate practice. A poorly constructed or positioned oche can lead to inconsistent throws and ultimately hinder your progress. Understanding the official measurements is the first step in any successful **darts oche diy** project.
Official Darts Oche Measurements
Before you even think about picking up tools, it’s vital to understand the official measurements as stipulated by organizations like the Professional Darts Corporation (PDC) and the World Darts Federation (WDF). These are the measurements you need to ensure a proper and competitive game:
- Height of the dartboard: The center of the bullseye should be 5 feet 8 inches (1.73 meters) from the floor.
- Distance from the oche to the dartboard (horizontal): This is the most critical measurement. The front of the oche should be 7 feet 9 1/4 inches (2.37 meters) from the face of the dartboard.
- Diagonal distance: From the bullseye to the oche is 9 feet 7 3/8 inches (2.93 meters). This is often used for double-checking the horizontal distance.
Double-checking these measurements is crucial. Use a reliable measuring tape and take your time. A slight error can significantly impact your game. For example, throwing from a slightly shorter distance might feel easier initially, but it will create bad habits that hinder your progress when playing on a regulation setup.
Planning Your Darts Oche DIY Project: Materials and Tools
Now that you know the measurements, let’s talk materials and tools for your **darts oche diy** adventure. The good news is, you don’t need to spend a fortune to create a professional-feeling oche.
Choosing the Right Materials
The material you choose for your oche will depend on your budget, skill level, and the desired aesthetic. Here are some popular options:
- Wood: Wood is a classic choice, offering durability and a traditional look. You can use hardwood for a more premium feel or softwood for a budget-friendly option. Consider using a piece of trim or molding for a finished look.
- Metal: Metal oches offer a sleek, modern aesthetic and are incredibly durable. Aluminum or steel are good choices.
- Rubber: Rubber oches are a great option for protecting your floors. They also provide a non-slip surface.
- Tape: While not the most durable option, heavy-duty tape can be a temporary solution. Use brightly colored tape for better visibility.
Essential Tools for the Job
Here’s a list of tools you’ll likely need for your **darts oche diy** project. The exact tools will vary based on your chosen material, but this is a good starting point:
- Measuring Tape: A reliable measuring tape is essential for accurate measurements.
- Level: Ensure your oche is perfectly level for consistent throws.
- Saw (if using wood or metal): A saw is needed to cut your chosen material to the correct length. A miter saw is ideal for precise cuts.
- Drill (if using wood or metal): You may need a drill to create pilot holes for screws or to attach the oche to the floor.
- Screws or Adhesive: Choose appropriate fasteners or adhesive based on your material and floor type.
- Sandpaper (if using wood): Sandpaper will smooth out any rough edges on your wooden oche.
- Paint or Stain (optional): Customize the look of your oche with paint or stain.
Remember to always prioritize safety when using tools. Wear appropriate safety gear, such as safety glasses and gloves.
Step-by-Step Guide to Building Your Darts Oche
Ready to get your hands dirty? This section provides a detailed, step-by-step guide to building your **darts oche diy**. We’ll focus on a wooden oche, as it’s a popular and relatively easy option for beginners.
Step 1: Measure and Cut the Wood
Begin by measuring and cutting your chosen piece of wood to the desired length. The oche should be at least as wide as the space between your feet when you throw. A common length is around 24 inches (60 cm). Ensure your cut is straight and clean. Use sandpaper to smooth any rough edges.
Step 2: Sand and Finish the Wood
Sand the entire piece of wood to create a smooth surface. This will improve the look and feel of your oche. Once sanded, you can apply a stain or paint to customize its appearance. Consider using a sealant to protect the wood from moisture and wear. Let the stain, paint, or sealant dry completely before proceeding.
Step 3: Position and Secure the Oche
This is the most crucial step. Using your measuring tape, carefully measure 7 feet 9 1/4 inches (2.37 meters) from the face of the dartboard. Mark this spot on the floor. This is where the front of your oche will be positioned. Place the oche on the floor, aligning the front edge with your mark. Use a level to ensure the oche is perfectly level. Secure the oche to the floor using screws or adhesive. If using screws, drill pilot holes first to prevent the wood from splitting. If using adhesive, apply a generous amount to the bottom of the oche and press it firmly onto the floor. Allow the adhesive to dry completely before using the oche.
Alternative: Creating a Portable Oche
If you don’t want to permanently attach your oche to the floor, you can create a portable oche. Simply build a wooden frame for the oche to sit on. This will allow you to move the oche around as needed. A portable oche is a great option for renters or those who don’t want to commit to a permanent installation. Check out various **darts technique for beginners** to practice your throws on the new oche!
Troubleshooting Common Darts Oche DIY Problems
Even with careful planning, you might encounter some challenges during your **darts oche diy** project. Here are some common problems and their solutions:
Problem: The Oche Isn’t Level
Solution: Use shims (thin pieces of wood or plastic) to level the oche. Place the shims under the oche until it’s perfectly level. Secure the shims with adhesive or screws.
Problem: The Oche Moves During Play
Solution: Use a stronger adhesive or longer screws to secure the oche to the floor. You can also add weight to the oche by attaching a metal plate to the bottom.
Problem: The Wood Splintered When Drilling
Solution: Always drill pilot holes before inserting screws. This will prevent the wood from splitting. Use a drill bit that is slightly smaller than the diameter of the screw.
Problem: The Oche is Too Slippery
Solution: Apply a non-slip coating to the top of the oche. You can find non-slip sprays or paints at most hardware stores. Alternatively, use a rubber mat in front of the oche for extra grip.
Beyond the Basics: Customizing Your Darts Oche
Once you’ve built your basic **darts oche diy**, you can customize it to match your personal style and preferences. Here are some ideas:
Adding a Design or Logo
Personalize your oche by adding a design or logo. You can paint a design onto the oche, use stencils, or even apply a vinyl decal. Consider adding your name, your favorite darts team’s logo, or a cool abstract design.
Integrating Lighting
Improve visibility by integrating lighting into your oche. You can install LED strip lights along the front of the oche or use recessed lighting in the floor. Proper lighting will enhance your throwing experience and make it easier to see the dartboard.
Adding a Raised Platform
If you want to create a more professional feel, consider adding a raised platform behind the oche. This will elevate you slightly and improve your posture. Make sure the platform is stable and secure. Consider exploring other related topics like **line darts player stands behind called** to help understand regulations of the game. Electronic dart score counter (https://dartcounterapp.com/) is also an option to make the process easier.
Maintaining Your Darts Oche
To keep your **darts oche diy** in top condition, regular maintenance is essential. Here are some tips:
Cleaning the Oche
Regularly clean the oche to remove dirt, dust, and debris. Use a damp cloth to wipe down the surface. Avoid using harsh chemicals or abrasive cleaners, as these can damage the finish.
Checking for Damage
Periodically inspect the oche for any signs of damage, such as cracks, splinters, or loose screws. Repair any damage promptly to prevent further deterioration. Check out more tips about **how to aim darts for beginners** to practice your throws!
Replacing Worn Parts
If any parts of the oche become worn or damaged beyond repair, replace them promptly. This will ensure the oche remains safe and functional.
Safety Considerations for Your Darts Setup
While darts is a fun and engaging game, safety should always be a top priority. Here are some safety considerations for your darts setup:
Protecting Your Walls
Darts can occasionally miss the board, so it’s important to protect your walls. Consider using a dartboard surround to catch stray darts. You can also install a backboard behind the dartboard.
Keeping Children and Pets Safe
Keep children and pets away from the darts playing area when the game is in use. Darts are sharp and can cause serious injury if handled improperly. Store darts in a safe place when not in use.
Using Proper Lighting
Proper lighting is essential for safe dart playing. Make sure the dartboard is well-lit and that there are no shadows that could obscure your view. Poor lighting can lead to inaccurate throws and increase the risk of injury.
Where to Find Inspiration for Your Darts Oche DIY
Stuck for ideas? The internet is a treasure trove of inspiration for your **darts oche diy** project. Here are some resources to check out:
Online Forums and Communities
Join online darts forums and communities to connect with other dart enthusiasts. These communities are a great place to ask questions, share ideas, and get feedback on your project.
Social Media
Follow darts-related accounts on social media platforms like Instagram and Pinterest. These accounts often share photos and videos of inspiring darts setups.
DIY Websites and Blogs
Browse DIY websites and blogs for step-by-step instructions and tutorials on building a darts oche. Many DIY websites offer detailed plans and instructions for various projects.
Darts Equipment Beyond the Oche
While a proper **darts oche diy** setup is crucial, don’t forget about the other essential equipment needed for a complete darts experience. Here’s a quick overview:
Dartboards
Choose a high-quality dartboard made from sisal fibers for optimal durability and self-healing properties. Look for a board with thin wires and a staple-free bullseye to minimize bounce-outs.
Darts
Experiment with different dart weights, shapes, and materials to find the perfect set for your throwing style. Brass darts are a budget-friendly option for beginners, while tungsten darts offer superior grip and control for more experienced players. Consider exploring **darts point with grip** to enhance your experience.
Lighting
Invest in a good dartboard lighting system to illuminate the target area evenly and reduce shadows. Circular lighting systems or dedicated dartboard lights are popular choices.
Scoreboard
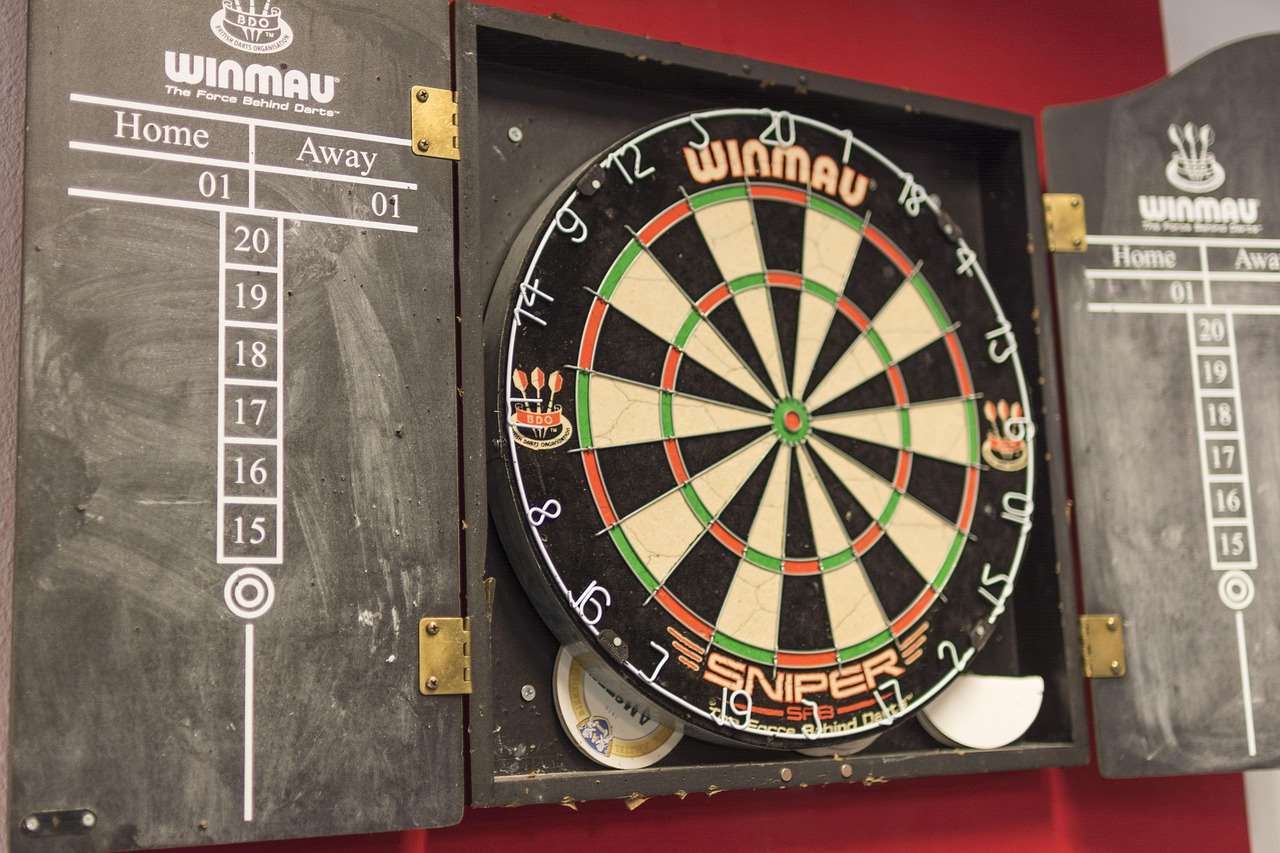
Keep track of your scores with a traditional chalkboard scoreboard or a modern electronic scoreboard. Electronic scoreboards offer features like automatic scoring and game statistics. Consider **darts online scoring** to make the process more efficient.
Beyond the Game: The Social Aspect of Darts
Darts is more than just a game; it’s a social activity that can bring people together. Here are some ways to enjoy the social aspect of darts:
Joining a Darts League
Join a local darts league to compete against other players and make new friends. Darts leagues offer a fun and competitive environment for players of all skill levels.
Hosting Darts Nights
Host darts nights at your home to entertain friends and family. Provide snacks, drinks, and a comfortable playing environment.
Attending Darts Tournaments
Attend professional darts tournaments to watch the world’s best players compete and soak up the atmosphere. Darts tournaments are a great way to experience the excitement of the sport.
Conclusion: Elevate Your Game with a DIY Darts Oche
Building your own **darts oche diy** is a rewarding project that can significantly enhance your darts experience. By following the steps outlined in this guide, you can create a regulation-compliant oche that is both functional and aesthetically pleasing. Remember to prioritize accuracy, safety, and personalization. With a well-built oche, you’ll be well on your way to improving your game and enjoying countless hours of darts fun. Now it’s time to take action! Gather your materials, follow the steps, and create your own custom darts oche. Good luck, and happy darting! Consider visiting zedar shop for any equipment you may need to get started!
Hi, I’m Dieter, and I created Dartcounter (Dartcounterapp.com). My motivation wasn’t being a darts expert – quite the opposite! When I first started playing, I loved the game but found keeping accurate scores and tracking stats difficult and distracting.
I figured I couldn’t be the only one struggling with this. So, I decided to build a solution: an easy-to-use application that everyone, no matter their experience level, could use to manage scoring effortlessly.
My goal for Dartcounter was simple: let the app handle the numbers – the scoring, the averages, the stats, even checkout suggestions – so players could focus purely on their throw and enjoying the game. It began as a way to solve my own beginner’s problem, and I’m thrilled it has grown into a helpful tool for the wider darts community.