Transform your game room with a stylish and functional homemade dartboard lighting with conduit. This guide will walk you through building your own lighting solution, providing a clear, bright playing area and enhancing the overall aesthetic of your dart setup. We’ll cover everything from material selection to installation, ensuring you create a professional-looking, high-quality light fixture.
⚠️ Still Using Pen & Paper (or a Chalkboard)?! ⚠️
Step into the future! The Dart Counter App handles all the scoring, suggests checkouts, and tracks your stats automatically. It's easier than you think!
Try the Smart Dart Counter App FREE!Ready for an upgrade? Click above!
Before we dive into the specifics of constructing your homemade dartboard lighting with conduit, let’s talk about why this method is superior to other lighting options. Using conduit provides a robust, durable, and easily customizable solution. You can adjust the length, angle, and even the number of light fixtures to perfectly suit your needs and your dartboard setup. Plus, the industrial aesthetic of exposed conduit adds a unique touch to your game room.
Choosing the Right Materials for Your Homemade Dartboard Lighting with Conduit
The success of your homemade dartboard lighting with conduit project hinges on selecting the right materials. Poor quality components can lead to safety hazards and a less-than-ideal lighting setup. Here’s what you’ll need:
- Electrical Conduit: Choose a durable material like galvanized steel or rigid PVC. Consider the length you need based on your dartboard’s position and the desired lighting placement. The diameter will depend on the size of the wiring you’ll be using.
- Wiring: Use appropriately rated wiring for your chosen light fixtures. Always prioritize safety and consult a qualified electrician if you’re unsure about any aspect of the electrical work. Consider using outdoor-rated wiring if your dartboard is in a location exposed to the elements.
- Light Fixtures: LED lights are a popular choice due to their energy efficiency and long lifespan. They produce minimal heat, reducing the risk of damage to nearby materials. Ensure that the light fixtures are compatible with your chosen wiring and voltage.
- Connectors and Fittings: You’ll need various connectors and fittings to assemble the conduit, including couplings, elbows, and boxes for mounting the light fixtures. These should be compatible with your conduit type and wiring.
- Mounting Hardware: You’ll need screws, wall anchors, and potentially other hardware to securely mount the conduit to the wall or ceiling.
Remember to always check local building codes and regulations before starting your project. Safety should be your top priority when working with electricity. If you’re not comfortable with electrical work, it’s best to consult a qualified professional.
Step-by-Step Guide to Building Your Homemade Dartboard Lighting with Conduit
Planning and Measurement
Before you even pick up a tool, careful planning is crucial. Measure the distance from your dartboard to the power source and determine the ideal placement of your lighting fixtures. Consider the angles required for optimal illumination, avoiding glare and shadows on the dartboard surface. Sketch out a diagram to visualize the conduit layout.
Assembling the Conduit
Once you have your measurements, you can start assembling the conduit. Use the appropriate connectors and fittings to create the desired configuration. Cut the conduit to the correct lengths using a hacksaw or pipe cutter. Ensure all joints are secure and properly connected.
Wiring the Fixtures
This step requires careful attention to detail. Connect the wires to the light fixtures according to the manufacturer’s instructions. Double-check all connections for security to prevent potential short circuits. Consult a qualified electrician if you are unsure about any aspect of the electrical work involved in your homemade dartboard lighting with conduit.
Mounting the Conduit and Fixtures
After completing the wiring, mount the conduit to the wall or ceiling using the appropriate mounting hardware. Ensure that the conduit is securely fastened to prevent it from sagging or becoming loose. Mount the light fixtures to the conduit, ensuring they are properly aligned and securely attached.
Testing and Final Touches
Before using your homemade dartboard lighting with conduit, test all connections and ensure everything is working correctly. Check for any loose wires or faulty connections. If you find any issues, rectify them before turning on the power.
Finally, add any desired finishing touches. You can paint the conduit to match your game room décor or add other decorative elements. Remember, the overall goal is to create a functional and visually appealing lighting solution. Consider adding a dimmer switch for adjustable brightness depending on the time of day or your preference. This also helps in maintaining a consistent playing environment with controlled lighting throughout the different times of play.
Troubleshooting Common Issues with Homemade Dartboard Lighting with Conduit
Even with careful planning and execution, you may encounter some issues. Here are some common problems and their solutions:
- Flickering lights: This usually indicates a loose connection or a problem with the wiring. Check all connections and replace any faulty wiring.
- Lights not turning on: This could be due to a blown bulb, a tripped circuit breaker, or a problem with the wiring. Check the bulbs, reset the circuit breaker, and inspect the wiring for any damage or loose connections.
- Overheating: If the conduit or light fixtures are getting too hot, this could indicate a problem with the wiring or the light fixtures themselves. Turn off the power and inspect for any potential issues. Consult Darts gear accessories lifespan to check for any potential issues related to the longevity of the materials.
Remember, working with electricity can be dangerous. If you’re uncomfortable troubleshooting electrical issues, it’s always best to contact a qualified electrician. A small investment in professional help can save you from potential hazards and costly repairs.
Advanced Techniques and Customization Options for Your Homemade Dartboard Lighting
Once you’ve mastered the basics of homemade dartboard lighting with conduit, you can explore more advanced techniques and customization options. For instance, you can experiment with different types of light fixtures, such as spotlights or track lighting, to achieve different lighting effects. You could also incorporate a smart lighting system to control the brightness and color temperature of your lights remotely. Consider the aesthetic impact of using different finishes for the conduit—black matte, brushed nickel, or even a custom painted design to integrate the lighting seamlessly with your overall game room theme.
If you’re looking for a more modern and sleek look, consider using thin conduit runs and incorporating the lighting into a custom dartboard surround. For added ambiance, you can include indirect lighting options, potentially using LED strip lights along the interior of a surrounding cabinet or shelf unit. This can offer a subtle glow enhancing the overall mood of your dart area. Always ensure proper ventilation around any lights, especially if they are enclosed within cabinetry. Dartboard surround depth considerations may impact your choice of lighting here.
Beyond the Basics: Maintaining Your Homemade Dartboard Lighting
Regular maintenance is essential for ensuring the longevity and safety of your homemade dartboard lighting with conduit. Periodically inspect all connections and wiring for any signs of damage or loose connections. Replace any faulty bulbs or components promptly. Cleaning the fixtures regularly will help to maintain their appearance and efficiency. For more information on equipment upkeep, see our guide on Darts Equipment Maintenance Customization.
Remember to always turn off the power before performing any maintenance or repairs. This simple precaution will greatly reduce the risk of electrical shock or other injuries. Consider consulting a qualified electrician for any major repairs or modifications.
By following these steps, you can create a custom lighting solution that enhances your dart playing experience. A well-lit dartboard minimizes errors caused by poor visibility, enabling better focus and precision. Good lighting also drastically improves the overall aesthetic of your game room transforming it into a space dedicated to enjoyment and friendly competition. Whether you’re aiming for a professional, modern, or rustic feel, a homemade dartboard lighting with conduit offers unparalleled flexibility.
Conclusion: Illuminate Your Game with Homemade Dartboard Lighting
Building your own homemade dartboard lighting with conduit is a rewarding project that combines functionality with personalization. By following this comprehensive guide, you can create a custom lighting solution perfectly suited to your dartboard setup. Remember to prioritize safety and consult a professional if you have any concerns about electrical work. With a little effort and attention to detail, you can transform your game room into a stylish and well-lit space for hours of enjoyable dart practice and competition. For alternative outdoor solutions, you might find our guide on Dartboard lighting for outdoors helpful.
So, what are you waiting for? Gather your materials, follow the steps, and illuminate your game! Share your creations and experiences in the comments below. Happy darting!
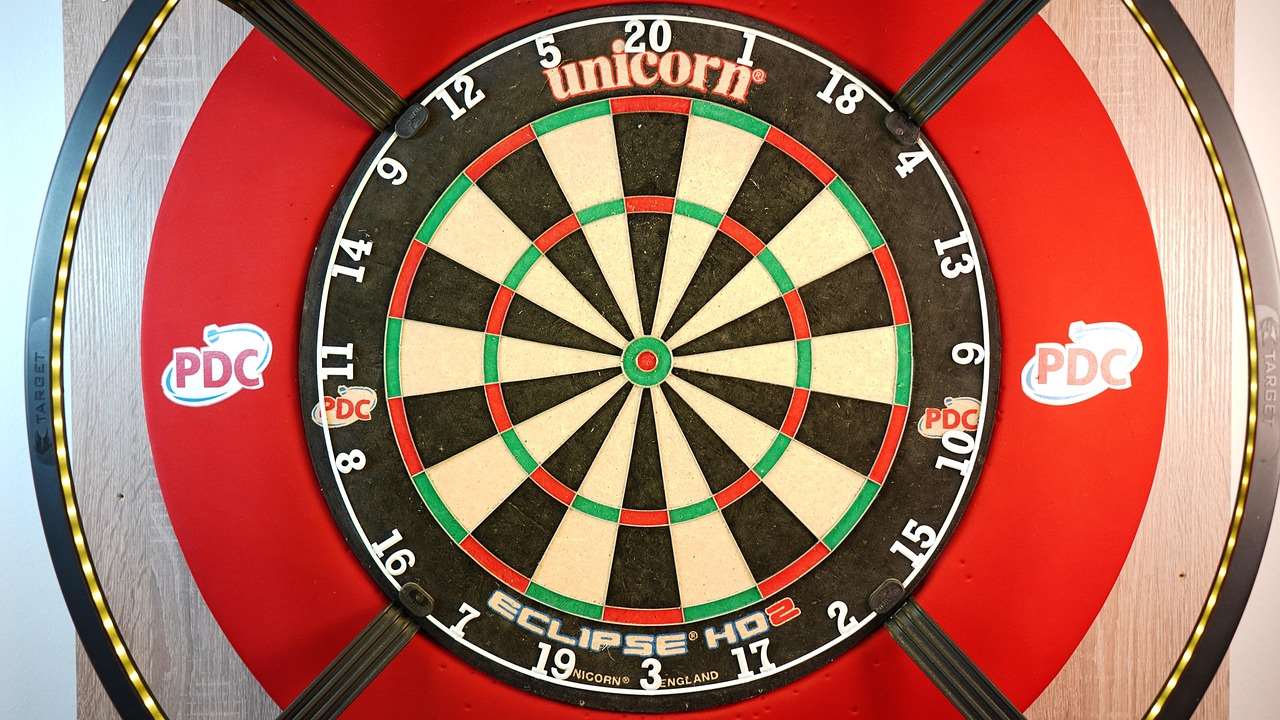
Electronic dartboard calibration software can help ensure your game is always accurate. For those seeking more information on dart flight design, check out our article on Dart flight design for recognition. If you’re interested in customizing your darts further, take a look at our resources on Custom dart flight printing and Custom dart flights retailer. And if you need advice on cleaning your darts, consult our Dart barrel cleaning guide. Finally, for a comprehensive overview of dart equipment lifespans, please consult our Darts gear lifespan guide.
Hi, I’m Dieter, and I created Dartcounter (Dartcounterapp.com). My motivation wasn’t being a darts expert – quite the opposite! When I first started playing, I loved the game but found keeping accurate scores and tracking stats difficult and distracting.
I figured I couldn’t be the only one struggling with this. So, I decided to build a solution: an easy-to-use application that everyone, no matter their experience level, could use to manage scoring effortlessly.
My goal for Dartcounter was simple: let the app handle the numbers – the scoring, the averages, the stats, even checkout suggestions – so players could focus purely on their throw and enjoying the game. It began as a way to solve my own beginner’s problem, and I’m thrilled it has grown into a helpful tool for the wider darts community.